Telescope Eyepieces Explained
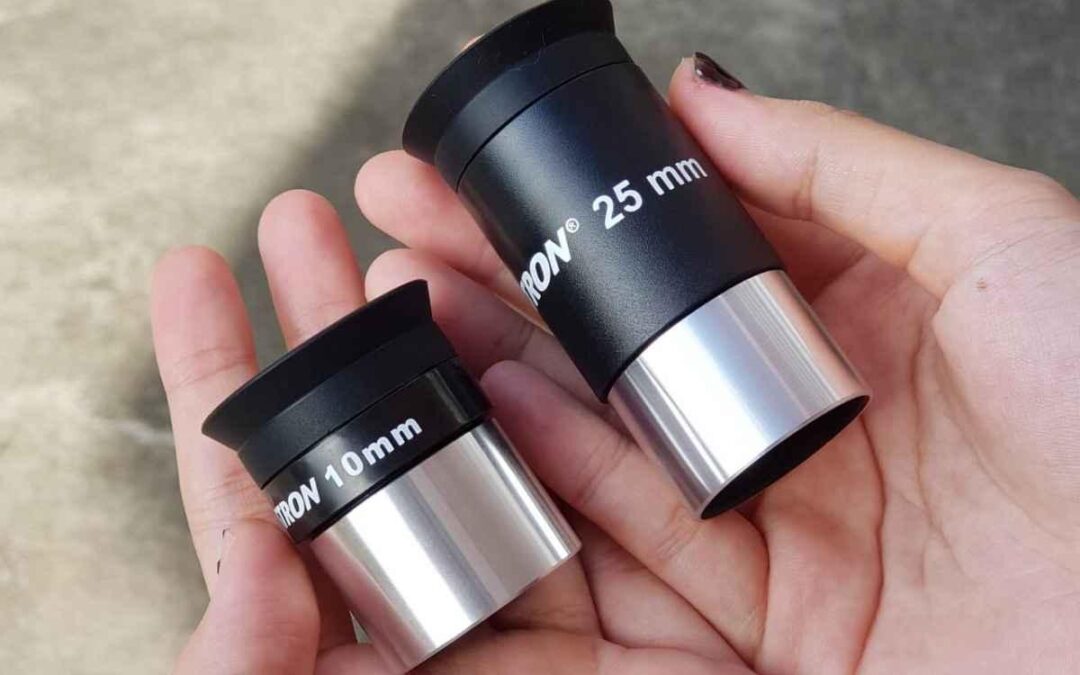
You’ve bought your first telescope, unpacked the eyepieces, and noticed two numbers: 25mm and 10mm.
Which one should you use first? Does the smaller number mean a better view? And if you add a Barlow lens, will Saturn suddenly look twice as impressive?
These are reasonable questions, especially when you’re standing outside with a new telescope and hoping to see something memorable.
The surprising answer is that more magnification doesn’t necessarily mean a better view.
Understanding a few simple principles will help you choose the right eyepiece, avoid disappointing results, and enjoy your telescope more.
What do 25mm and 10mm mean on telescope eyepieces?
The number printed on an eyepiece is its focal length, measured in millimeters.
It isn’t the eyepiece’s diameter, and it doesn’t tell you how good the eyepiece is.
Instead, the number helps determine how much magnification your telescope produces.
A 25mm eyepiece generally provides lower magnification, a wider view, and an easier starting point for finding objects.
A 10mm eyepiece produces higher magnification in the same telescope. Objects appear larger, but the field of view becomes narrower.
That’s why experienced observers often begin with their lowest-power eyepiece, even when they’re planning to observe a planet.
It’s easier to find something when you can see more of the sky.
Once you’ve located and centered your target, you can switch to a shorter-focal-length eyepiece for a closer look.
How do you calculate telescope magnification?
You only need two numbers: your telescope’s focal length and your eyepiece’s focal length.
The formula is:
Magnification = Telescope focal length ÷ Eyepiece focal length
For example, imagine you own a Dobsonian telescope with a focal length of 1,200mm.
| Eyepiece | Magnification |
| 25mm | 48× |
| 10mm | 120× |
| 6mm | 200× |
The smaller the eyepiece focal length, the greater the magnification.
But notice something important.
A 6mm eyepiece doesn’t collect more light than a 25mm eyepiece. The telescope’s primary mirror or objective lens determines how much light the instrument gathers.
The eyepiece changes how that collected light is presented to your eye.
At higher magnification, the image is spread over a larger apparent area, so extended objects usually appear dimmer.
That’s one reason a higher-power view can be less satisfying than you expected.
What does a Barlow lens do?
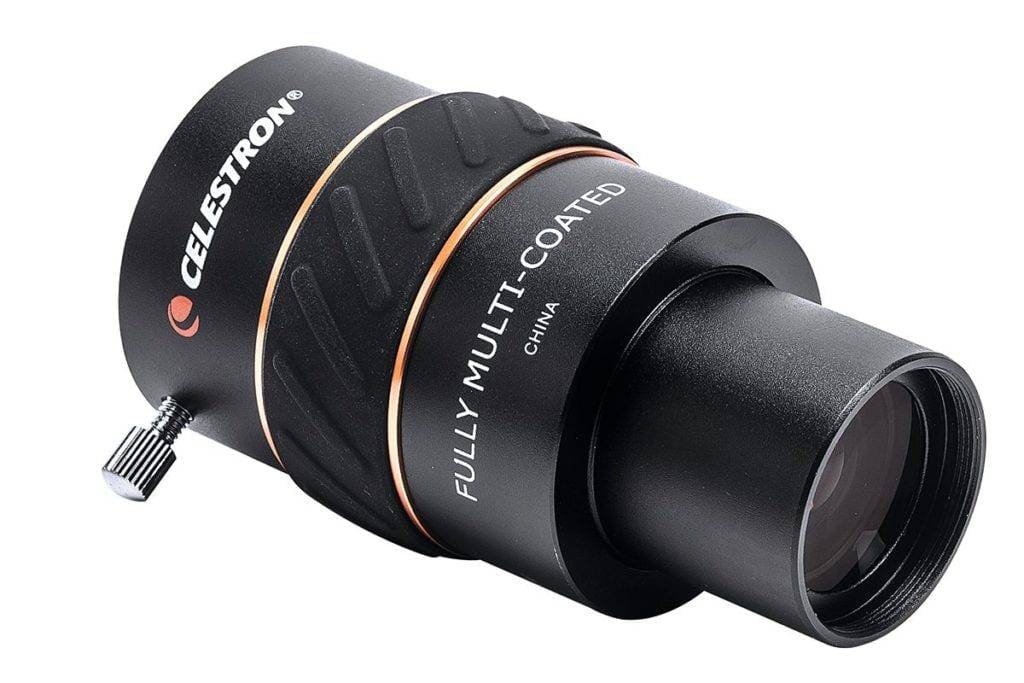
A Barlow lens is an accessory that increases your telescope’s effective focal length.
It fits between the telescope’s focuser and the eyepiece, allowing the same eyepiece to produce more magnification.
A common example is a 2× Barlow lens.
In our 1,200mm telescope example:
| Eyepiece | Normal | With 2× Barlow |
| 25mm | 48× | 96× |
| 10mm | 120× | 240× |
A Barlow can be useful because it gives you additional magnification choices without requiring another eyepiece for every power.
However, it doesn’t create additional detail that your telescope or the atmosphere cannot resolve.
If Jupiter already looks soft at 120×, increasing to 240× with a Barlow is unlikely to improve the image.
It will usually make the softness more obvious.
A good Barlow is a useful accessory. It isn’t a shortcut to unlimited magnification.
Why does the image become soft and dim at higher power?
This is one of the most important lessons in beginner astronomy.
You find Saturn, change to a higher-power eyepiece, and expect a dramatic improvement.
Instead, the planet looks larger but less distinct.
Sometimes it appears to shimmer or drift in and out of focus.
There are several reasons.
The atmosphere limits sharpness.
Even on a clear night, moving air can distort the light reaching your telescope.
Astronomers call this atmospheric seeing.
At low magnification, the disturbance may be barely noticeable.
At higher magnification, the same turbulence becomes much more obvious.
Higher power spreads out the available light.
Magnification enlarges the apparent image, but it doesn’t increase the light your telescope collects.
For extended objects such as planets and the Moon, increasing magnification generally reduces surface brightness.
A larger image can therefore appear dimmer.
Every telescope has practical limits.
A telescope’s aperture determines its ability to collect light and resolve fine detail.
Larger apertures can reveal more under suitable conditions, but even a large telescope has limits.
No single magnification works perfectly every night.
For many beginner telescopes, moderate magnification provides the most consistently useful views.
Focus becomes more demanding.
At high magnification, small focusing errors become easier to notice.
Make gentle adjustments and give the image time to settle.
If the view refuses to become sharp, return to a lower-power eyepiece.
The best magnification is the one that shows the most useful detail, not necessarily the one that makes the object look largest.
What will Saturn’s rings actually look like?
Saturn is one of the most rewarding objects to observe through a beginner telescope.
But it’s important to have realistic expectations.
You won’t see the enormous, colorful planet shown in spacecraft photographs.
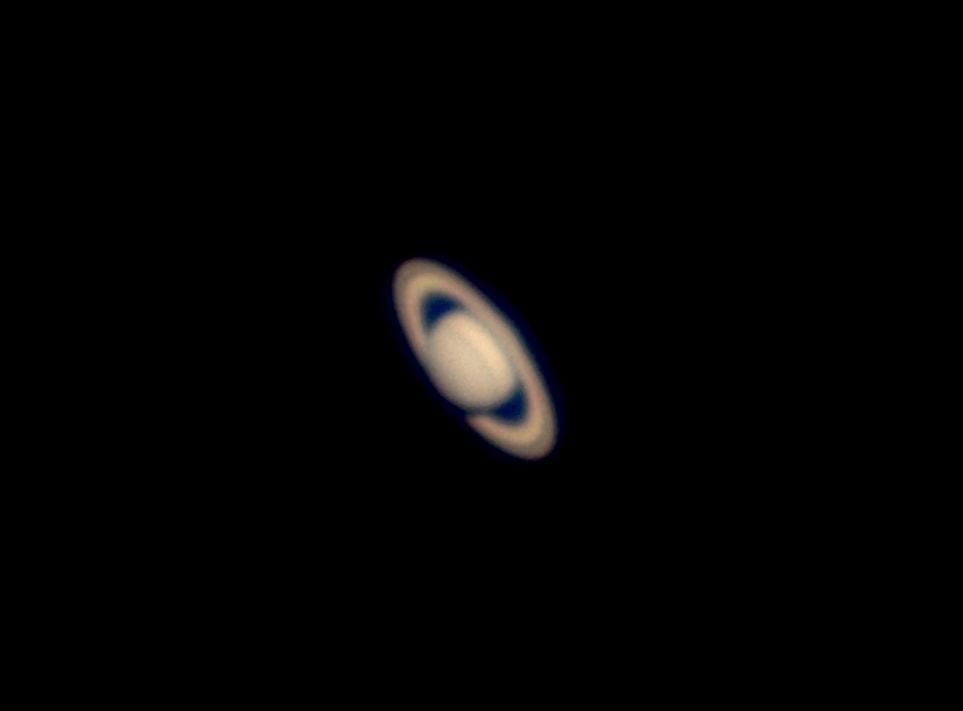
Through a typical beginner telescope, Saturn appears small, often with a pale yellow or cream-coloured disc.
When the rings are sufficiently tilted towards Earth and observing conditions are favorable, you can see them extending beyond the planet.
At modest magnification, Saturn may resemble a tiny oval with projections on either side.
With more magnification and steady atmospheric conditions, the separation between the planet and its rings becomes easier to recognize.
A well-collimated 6-inch or 8-inch Dobsonian can produce rewarding views, although the amount of detail varies with the rings’ changing orientation.
When the rings are nearly edge-on, they can become difficult to see.
That doesn’t mean your telescope is faulty.
It’s simply the geometry of Saturn’s orbit and our changing viewing angle.
The honest expectation: Saturn will look small, and the image won’t resemble a photograph. Yet recognizing its rings with your own eyes is still a remarkable experience.
What will Jupiter and its moons look like?
Jupiter is another excellent beginner target.
Even at relatively low magnification, it often appears as a bright, small disc rather than a point of light.
With steady conditions and sufficient magnification, you may notice one or two darker cloud bands crossing the planet.
The four largest moons — Io, Europa, Ganymede and Callisto — are particularly satisfying to observe.
They usually appear as tiny points of light near Jupiter, often arranged in a line.
Their positions change from night to night as they orbit the planet.
You don’t need enormous magnification to see them.
In fact, a lower-power eyepiece can make it easier to keep Jupiter and several of its moons in the same field of view.
Depending on the moons’ positions, some may be hidden behind Jupiter or crossing in front of it.
The honest expectation: Jupiter will look small, its cloud bands may be subtle, and its moons will resemble tiny stars rather than miniature worlds.
But seeing those moons with your own eyes gives you a direct view of another planetary system in motion.
That’s worth the effort.
Do you need special eyepieces if you wear glasses?
If you wear glasses, there’s one particularly important eyepiece specification.
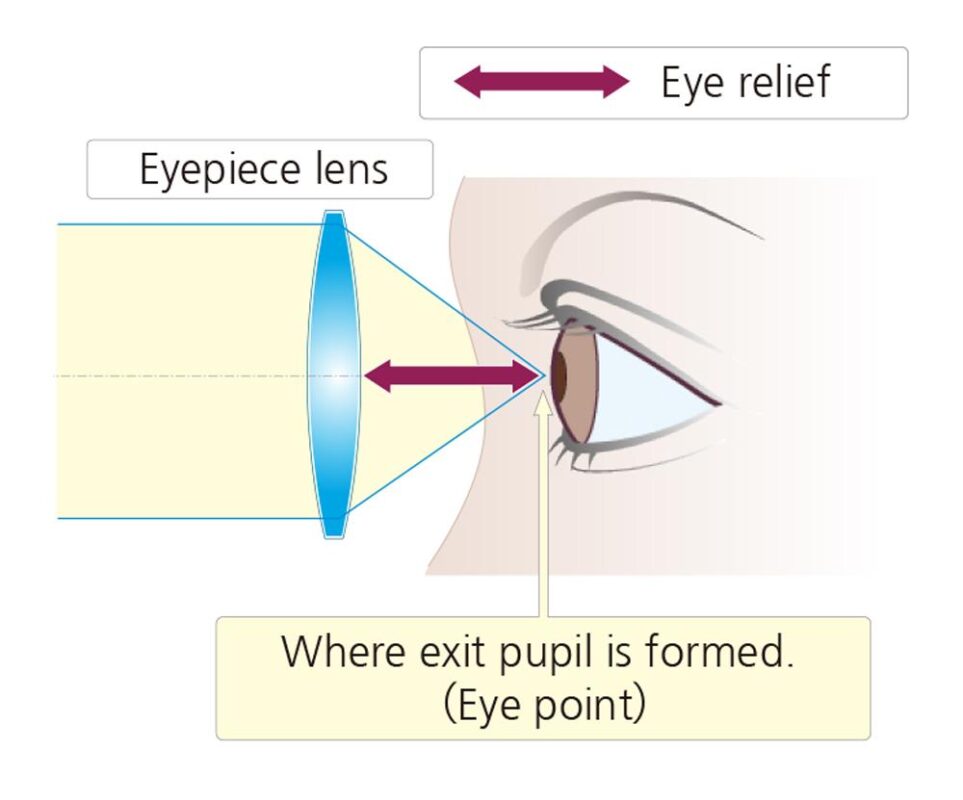
It’s called eye relief.
Eye relief is the distance between the eyepiece’s outer lens and the position where your eye needs to be to see the full field of view.
An eyepiece with very short eye relief may force you to place your eye uncomfortably close to the lens.
That can be difficult when you’re wearing glasses.
What eye relief should glasses wearers look for?
As a practical starting point, look for an eyepiece offering around 18–20mm of eye relief, or more.
Many observers who wear glasses find this more comfortable than eyepieces with only 5–10mm of eye relief.
However, comfort also depends on the eyepiece’s design, the shape of your glasses, and how far your eyes sit behind the lenses.
An eyepiece advertised as having 20mm of eye relief isn’t guaranteed to suit everyone.
If possible, try one before buying.
Do you always need to wear glasses at the telescope?
Not necessarily.
If you wear glasses only to correct short-sightedness or long-sightedness, you can often remove them and refocus the telescope to suit your eyesight.
However, if you have significant astigmatism, keeping your glasses on may produce a sharper view, particularly at lower magnifications.
Some observers use specialist eyepiece accessories designed to correct astigmatism.
The important point is that you shouldn’t have to struggle to see through your telescope.
If wearing glasses makes the view uncomfortable, check the eyepiece’s eye relief before assuming you need a different telescope.
Which eyepiece should you use first?
For a beginner using a telescope with 25mm and 10mm eyepieces, I’d recommend a simple approach.
Start with the 25mm.
Use it to locate the Moon, Jupiter, Saturn, or another bright target.
Center the object carefully.
Once you’ve found it, try the 10mm eyepiece and compare the views.
Does the higher magnification reveal more useful detail?
If it does, keep using it.
If the image becomes soft, dim, or difficult to focus, return to the 25mm.
Don’t feel obliged to use the highest magnification your telescope can produce.
Some of the most enjoyable views come from lower power, particularly when observing star clusters and larger areas of the Moon.
And remember that a wider view can make finding and tracking objects much easier.
Do you need to buy more eyepieces immediately?
Usually, no.
The eyepieces supplied with a decent beginner telescope are often enough to get started.
Spend time learning how your telescope behaves before buying additional accessories.
Notice which magnifications you use most often and where your existing eyepieces fall short.
Perhaps you’d benefit from a comfortable medium-power eyepiece.
Perhaps you wear glasses and need longer eye relief.
Or perhaps your current eyepieces already give you everything you need for your favorite targets.
Buying another eyepiece makes sense when it solves a problem you’ve actually experienced.
It shouldn’t be something you feel pressured to do before you’ve enjoyed your first clear night.
Enjoy what your telescope can really show you.
The numbers printed on eyepieces can make astronomy seem more complicated than it needs to be.
A 25mm eyepiece gives you a useful starting point. A 10mm brings objects closer. A Barlow provides additional magnification options.
But none of them guarantees a sharper image simply by making an object larger.
Saturn’s rings and Jupiter’s moons may look smaller and less dramatic than the photographs that inspired you to buy a telescope.
They’re still extraordinary things to see for yourself.
Start with lower magnification, take your time, and let the observing conditions guide your choices.
If you’re preparing to use a new telescope, our first-night telescope guide will help you get started.
If you’re still deciding which telescope to purchase, our Buying Your First Telescope guide explains the practical differences between beginner models.
The goal isn’t to use the most powerful eyepiece. It’s to enjoy the clearest, most satisfying view your telescope can deliver.
Explore beginner telescopes,binoculars and best stargazing apps for beginners here: