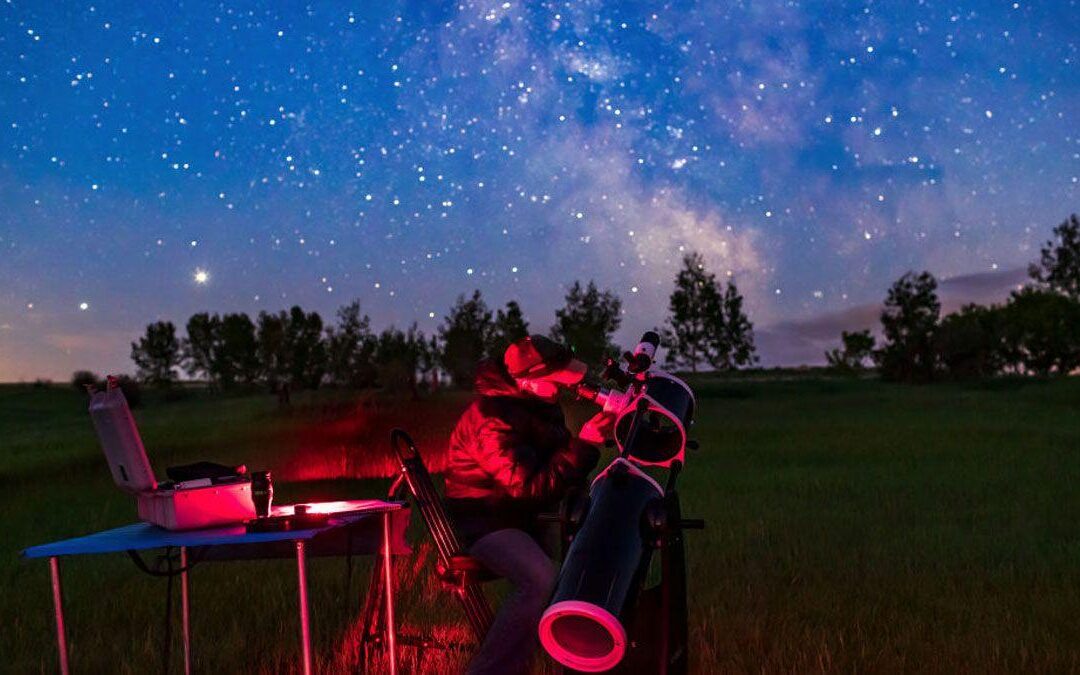
Telescope Accessories for Beginners
Telescope accessories for beginners don’t need to be expensive or complicated. Before buying anything, check what came with your telescope. You may already have everything required for your first night under the stars.
Four additions are worth considering, in this order: a dim red flashlight, a collimation tool if your reflector needs one, a comfortable place to sit, and possibly a 2× Barlow lens after you’ve gained some observing experience.
Not everyone needs all four. In fact, the best improvement you can make at the beginning costs nothing.
This guide explains what your existing equipment can do, which accessories solve genuine problems, and which purchases can wait until you know you need them.
1. Start With What You Already Own
When you unpack a telescope, it’s easy to assume the supplied eyepieces are basic accessories that you’ll eventually need to replace.
That’s not necessarily true.
A telescope’s focal length and the eyepieces it comes with determine the magnifications available from the start.
Consider two popular beginner telescopes.
| Telescope | Supplied eyepiece | Magnification |
| Apertura AD8, 1,200 mm focal length | 30 mm | 40× |
| Apertura AD8 | 9 mm | 133× |
| Sky-Watcher Heritage 130, 650 mm focal length | 25 mm | 26× |
| Sky-Watcher Heritage 130 | 10 mm | 65× |
These examples use the standard eyepiece combinations for the specified packages. Check your own telescope’s supplied equipment before purchasing replacements.
Magnification is calculated by dividing the telescope’s focal length by the eyepiece’s focal length.
The AD8’s 30 mm eyepiece gives a wider 40× view, useful for finding objects and exploring star fields. Its 9 mm eyepiece provides approximately 133×, a useful starting magnification for examining the Moon and planets.
The Heritage 130 offers 26× and 65× with its supplied eyepieces. Those magnifications are useful for learning your way around the sky, observing the Moon, and exploring brighter celestial objects.
Neither telescope requires an immediate eyepiece upgrade.
The Apertura AD8 also comes with a laser collimator and a Moon filter in its current standard package. Buying another collimation tool or Moon filter without checking the box could mean paying twice for something you already own.
Before spending more money, take everything outside and learn how it works.
If you’re still deciding which telescope to purchase, our Buying Your First Telescope: Complete Beginner’s Guide explains the choices that matter before you commit.
2. The Free Improvement That Comes Before Any Accessory
Your eyes need time to adapt to darkness, especially when you’re trying to see faint stars, clusters, and nebulae.
Avoid bright lights and give yourself around 20–40 minutes to become more dark-adapted. Keep your phone screen dim or put it away.
Bright white light can disrupt that adaptation, and even red light can interfere if it’s too bright.
That’s why a dim red flashlight is worth considering. It lets you find your equipment without unnecessarily sacrificing the night vision you’ve been developing.
For more on preparing for an observing session, read our How to Use Your New Telescope guide.
 3. A Dim Red Flashlight: The First Accessory I’d Consider
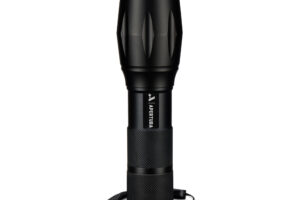 3. A Dim Red Flashlight: The First Accessory I’d Consider
Reference price: $14.95 at High Point Scientific
A red flashlight helps you read notes, change eyepieces, and find equipment without switching on a bright white light.
White light can bleach some of the light-sensitive visual pigments involved in night vision, including rhodopsin in the eye’s rod cells.
Your eyes then need time to recover their sensitivity.
Red light generally affects rod-mediated night vision less than comparable white light, especially when it is deep red and kept dim. It doesn’t make dark adaptation immune to disruption.
The practical lesson is simple: choose a red light dim enough for the task, not one that illuminates the entire garden.
The Apertura Astro Vision Red LED Flashlight at High Point Scientific was listed at $14.95 when checked in November 2026.
If you’d rather keep your hands free, the Apertura Ember Headlamp was listed at $24.95. Its very low brightness setting is particularly useful for observing.
Can you make your own red flashlight?
Certainly.
If you already own a small flashlight, you can cover its lens with suitable red filter material and secure it carefully. You may need several layers to reduce the brightness enough.
It’s a practical temporary solution, although some improvised red coverings transmit unwanted wavelengths or too much light. A purpose-built dim red astronomy flashlight gives you more predictable illumination.
My recommendation: Start with a suitable light you already own. Buy a dedicated astronomy flashlight if your existing arrangement is inconvenient or too bright.
4. A Collimation Tool: Check the Box Before Buying One
Reference price: $14.95 for an Apertura collimation cap
Newtonian reflector telescopes use mirrors that need to be correctly aligned.
This alignment is called collimation.
When a reflector is significantly out of alignment, the view can lose sharpness. Fine details on the Moon and planets may appear softer than they should.
A beginner can easily mistake this for poor telescope quality.
A simple collimation cap helps you inspect mirror alignment and make appropriate adjustments using the manufacturer’s instructions.
The Apertura 1.25-inch Collimation Cap was listed at $14.95.
However, not every beginner needs to buy this.
The standard Apertura AD8 package already includes a laser collimator. Other reflector packages may include a cap or another alignment tool.
Refractor telescopes generally don’t require the same routine Newtonian mirror-alignment procedure.
A collimation cap is also not a complete substitute for every more advanced alignment tool, so follow the instructions for your particular telescope.
My recommendation: If you own a Newtonian reflector, learn what collimation involves and check whether your telescope already includes a suitable tool. Only buy another one when you genuinely need it.
5. Somewhere Comfortable to Sit
This may be the most underrated accessory in beginner astronomy.
A telescope can provide an excellent view, but it’s difficult to enjoy it when you’re bending awkwardly, kneeling on damp grass, or stretching to reach the eyepiece.
Dobsonian telescopes are particularly sensitive to observing height because the eyepiece moves as you point the telescope towards different parts of the sky.
An uncomfortable position can make you rush your observations or abandon the session earlier than you’d intended.
Before buying specialist equipment, try a stable chair or stool you already own.
Choose something that places your eye comfortably at the eyepiece and remains secure on the ground. Avoid unstable furniture, particularly on uneven surfaces.
For a tabletop Dobsonian such as the Heritage 130, remember the telescope also needs firm, steady support at a suitable height.
Purpose-built observing chairs can be useful when you begin spending longer periods outside, but they aren’t cheap.
For example, High Point Scientific listed the Tele Vue Air Chair at $292 when checked in November 2026.
That’s a substantial amount to spend on seating when you’re still learning to use your first telescope.
My recommendation: Solve the comfort problem first, using furniture you already own wherever possible. Consider an adjustable astronomy chair only if your observing experience shows that you need one.
6. A Barlow Can Wait Until You’ve Been Out Three Times
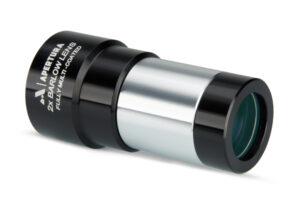 6. A Barlow Can Wait Until You’ve Been Out Three Times
A 2× Barlow lens fits between a compatible eyepiece and your telescope, approximately doubling the magnification.
It can be a relatively economical way to expand the magnifications available from your existing eyepieces.
But there’s a catch: not every Barlow is equally useful with every telescope.
The Heritage 130 example
The Heritage 130 comes with 25 mm and 10 mm eyepieces.
| Eyepiece | Standard magnification | With 2× Barlow |
| 25 mm | 26× | 52× |
| 10 mm | 65× | 130× |
The 130× option can be useful for closer views of the Moon and planets when atmospheric conditions permit.
The 52× option, however, is fairly close to the telescope’s existing 65× magnification.
So although a Barlow technically gives you additional combinations, not every combination represents a significant improvement.
The AD8 example
The Apertura AD8 presents a different situation.
Its standard 30 mm eyepiece has a 2-inch barrel, while its 9 mm eyepiece uses a 1.25-inch barrel.
The Apertura 1.25-inch 2× Barlow cannot directly accept the AD8’s 2-inch 30 mm eyepiece.
It can accept the 1.25-inch 9 mm eyepiece, but that produces approximately 267× magnification.
Although an 8-inch telescope can sometimes support that power, atmospheric conditions frequently make lower magnifications more useful.
For someone buying an AD8, this particular Barlow is therefore not an obvious first accessory.
A carefully selected intermediate-power eyepiece may eventually be more useful, depending on what you enjoy observing.
My recommendation: Use your supplied eyepieces for at least three observing sessions before considering a Barlow. You’ll be in a much better position to decide whether more magnification would actually improve your experience.
7. Do You Need a Moon Filter?
Not necessarily.
A Moon filter reduces the brightness of the lunar image and may make observing more comfortable for some people.
But it’s an optional accessory.
The Moon is particularly rewarding around its first-quarter and last-quarter phases, when shadows along the terminator reveal craters, mountains, and other surface features.
Try observing the Moon at different phases before buying a filter.
And remember, the current standard Apertura AD8 package already includes one.
8. Telescope Accessories I’d Leave on the Shelf
Plenty of astronomy accessories have legitimate uses but offer little immediate benefit to someone learning to operate a first telescope.
Large eyepiece kits: Several inexpensive eyepieces don’t necessarily improve on the useful eyepieces already supplied.
Colored planetary filter sets: These can help with particular observations, but they’re rarely a beginner’s priority.
5× Barlow lenses: These can push magnification beyond what typical beginner equipment and atmospheric conditions can support.
Smartphone adapters: Enjoyable for experimenting with lunar photography, but not essential for learning visual astronomy.
Camera adapters: Buying an adapter doesn’t automatically make a telescope suitable for serious astrophotography.
Old 0.965-inch eyepieces: Generally incompatible with modern telescopes designed for 1.25-inch or 2-inch accessories.
Green laser pointers: Not needed for ordinary beginner observing and potentially dangerous when misused, particularly near aircraft.
Dew heaters: Useful when dew becomes a recurring problem, but not something everyone needs immediately.
Expensive collimation lasers: Worth considering in some situations, but only after checking whether your reflector already includes an appropriate alignment tool.
None of these accessories is necessarily worthless.
The question is whether it solves a problem you actually have.
9. One Solar Accessory You Should Never Use
Never use a solar filter that screws into a telescope eyepiece.
These older-style filters can crack or fail under concentrated sunlight, potentially causing permanent eye damage or blindness.
Safe telescope solar observing requires a suitable, undamaged, securely fitted, certified full-aperture solar filter covering the front opening, used according to the manufacturer’s instructions.
Never look through an unfiltered telescope or finder scope at the Sun.
If you’re unsure about the equipment or procedure, don’t attempt solar observing.
10. What Does Your First Telescope Really Cost?
Our Best Beginner Telescopes Under $300 guide explains why a carefully chosen budget telescope can be a sensible starting point.
But the telescope’s advertised price isn’t always the complete cost of getting started.
Consider the Sky-Watcher Heritage 130, using the $269 reference price from our budget guide.
| Item | Reference cost |
| Sky-Watcher Heritage 130 | $269.00 |
| Apertura red flashlight | $14.95 |
| Apertura collimation cap | $14.95 |
| Apertura 2× Barlow | $34.95 |
| Existing household stool | $0.00 |
Total if all three paid accessories are purchased | $333.85 |
Illustrative US-dollar prices before applicable taxes and shipping. Product prices and included accessories can change.
A $269 telescope becomes a $333.85 purchase if you add those three accessories.
That’s worth understanding before you set your budget.
But it doesn’t mean you should buy all three.
If the telescope already includes an appropriate collimation tool, you don’t need another.
If you own a suitable dim red light, there’s no reason to replace it.
And if you haven’t yet discovered a need for higher magnification, the Barlow can wait.
Buying only the $14.95 flashlight would bring this example to $283.95.
Buying nothing extra would leave the telescope at its $269 reference price, before any applicable taxes or shipping.
The Heritage 130 also needs a stable surface; if you don’t already have a suitable table or support, budget for one.
This is the distinction between a telescope’s purchase price and the cost of a practical observing setup.
11. Sometimes Your Money Is Better Spent Getting Away From City Lights
Suppose you have $50 left after purchasing your telescope.
You could buy another eyepiece or filter.
Or you could put that money towards traveling to a darker observing location.
If you normally observe beneath suburban lighting, a darker sky can make faint stars, nebulae and galaxies easier to see.
That won’t improve every target equally. The Moon and bright planets can be excellent subjects from a suburban backyard.
But for many faint deep-sky objects, darker surroundings can make a greater difference than another inexpensive accessory.
A new eyepiece cannot remove the glow of city lights.
Sometimes the most useful purchase isn’t something that fits inside your telescope case.
It’s the fuel that gets you beneath a better sky.
12. What Should You Buy First?
For most beginners, the sensible order is straightforward.
Start with the telescope and accessories you already own.
Learn how to assemble the equipment, locate an object, focus accurately, and change eyepieces.
Use a dim red flashlight if you need one.
Make sure you can observe comfortably.
Check collimation when appropriate for your telescope, using the equipment supplied or a suitable basic tool.
Only consider a Barlow or another eyepiece when you’ve identified a genuine need for additional magnification.
No one wins a prize for owning the most accessories.
A well-used beginner telescope with two eyepieces can provide years of rewarding observing.
And the best accessory is the one that solves a problem you’ve actually experienced.
Your First Clear Night: Get Our Free Beginner’s Guide
If you’ve just bought a telescope, there’s something more useful than another accessory.
Knowing what to do when you take it outside.
Our free Your First Night Out guide helps you prepare for your first observing session, understand what to look for, and avoid common beginner frustrations.
It includes practical preparation advice, five things to observe, and a first-night checklist.
You don’t need another shopping list. You need a clear night, a little preparation, and the confidence to begin.
Explore beginner telescopes, binoculars and best stargazing apps for beginners here:
Affiliate disclosure: White Star Outdoors may earn a commission from qualifying purchases made through retailer links on this page, at no additional cost to you. Recommendations are based on their suitability for beginners, not on encouraging unnecessary purchases. Prices were checked in November 2026 and may change.