How to Use Your New Telescope
The Moon looks like a bright blob with a ragged edge. The stars are fuzzy dots that won’t sit still. You’ve been standing in the dark for twenty minutes, and you’re beginning to wonder whether you’ve bought the wrong telescope.
Or perhaps you haven’t bought one yet. You’ve been looking at beginner telescopes online, and you’re wondering how difficult they are to use once you get them home.
Here’s something worth knowing before you spend another dollar: most first-night disappointments have little to do with the telescope’s quality.
They usually come down to a few simple things: using too much magnification, an unaligned finder, poor focusing, or expecting to see something the telescope was never designed to show.
Get those things right, and your first evening becomes much more enjoyable.
This guide walks you through what to do before sunset, how to find your first objects, what you should realistically expect to see, and how to handle the problems almost every beginner encounters.
The short answer: Set up in daylight, start with your lowest-power eyepiece, align the finder, and choose an easy target. The Moon is ideal when it’s visible. Take time to learn the equipment before worrying about more magnification or extra accessories.
Before It Gets Dark: Five Things Worth Doing
The best twenty minutes of your first observing session may be the twenty minutes you spend preparing while there’s still daylight.
Take the telescope outside and familiarise yourself with its controls.
- Remove the covers. Check the main telescope opening, finder, and eyepiece. It’s surprisingly easy to leave a protective cap in place.
- Find the focuser. Gently turn the focusing knob through its normal range so you know how it operates.
- Choose firm ground. A stable surface makes observing easier. Avoid placing the telescope where nearby buildings, trees, or outdoor lights will obstruct your view.
- Fit your lowest-power eyepiece. This gives you a wider view of the sky and makes objects easier to locate.
- Align the finder. Do this before dark, when you can aim at a distant stationary object.
If you’ve bought a Dobsonian telescope, practice moving it from side to side and up and down.
The tube sits on a rotating base. You guide it by hand towards the object you want to observe.
A computerized telescope has a different routine. It may be able to find and track objects for you, but only after you’ve completed the required setup and alignment.
Learn that procedure in daylight rather than trying to understand an unfamiliar hand controller in the dark.
You’ll have enough to think about when the stars come out.
Give Your Telescope Time to Adjust to the Outdoor Temperature
Imagine bringing a telescope from a warm living room into a cool backyard.
The air inside the tube and the optical components may still be warmer than the surrounding air.
Those temperature differences can disturb the light traveling through the telescope and make the image appear soft or unsteady.
Reflecting telescopes with larger mirrors can take longer to settle.
Twenty to thirty minutes is a reasonable initial allowance, but a substantial temperature difference may require an hour or more.
The Apertura AD8, for example, includes a cooling fan to help its primary mirror approach the outdoor temperature.
You don’t need to stand beside the telescope waiting.
Set it up somewhere secure, let it adjust, and return when you’re ready to observe.
If the image still shimmers later, the atmosphere itself may be responsible.
Some nights provide steadier views than others.
Why the Image Looks Upside Down
Point your telescope at a distant object during daylight, and you might find the image upside down, reversed, or rotated.
Don’t panic.
Astronomical telescopes are designed to gather light and reveal distant objects, not necessarily to show them in the same orientation as your eyes.
The apparent image orientation depends on the telescope’s optical design and any accessories fitted.
A Newtonian reflector, including a Dobsonian, normally produces a rotated image. A refractor fitted with a common star diagonal may show an upright but left-to-right reversed view.
Neither is a fault.
When you’re looking at the Moon, Jupiter, or Saturn, image orientation makes little practical difference.
The important thing is learning how the telescope moves and how that movement changes what you see through the eyepiece.
Why Stars Still Look Like Tiny Points
This is where expectations sometimes collide with reality.
You buy a telescope hoping to see enormous glowing stars, but most still look like tiny points of light.
That’s exactly how they should look.
Stars are so distant that ordinary amateur telescopes cannot resolve their surfaces.
But this is where things get interesting. You look up through the telescope and discover that a patch of sky that seemed almost empty is suddenly crowded with stars.
Some are too faint to see with the naked eye. Others turn out to be pairs of stars sitting close together.
And then there are the objects that make a beginner want to stay outside longer.
The Moon reveals craters and mountain shadows. Jupiter may show its darker cloud belts and four bright moons. Saturn’s rings can be visible when they’re favorably presented.
Star clusters reveal groups of stars that you might never have noticed. Nebulae and galaxies can appear as faint grey shapes under suitable conditions.
They usually won’t resemble the colorful photographs taken by professional observatories.
Those images often involve long exposures and considerable processing.
The view through an eyepiece is different, but there’s something special about knowing the light you’re seeing has traveled across space and is entering your own telescope.

Start With Your Lowest-Power Eyepiece
Most beginner telescopes arrive with one or two eyepieces.
You’ll see numbers printed on them, such as 25mm, 30mm, or 9mm.
These numbers refer to the eyepiece’s focal length, not its magnification.
To calculate magnification, divide the telescope’s focal length by the eyepiece’s focal length.
For example, a telescope with a 1,200mm focal length produces:
- 48× magnification with a 25mm eyepiece
- 40× magnification with a 30mm eyepiece
- Approximately 133× magnification with a 9mm eyepiece
Start with the longer focal-length eyepiece.
Lower magnification usually gives you a wider field of view, making objects easier to find and keep centered.
Higher magnification isn’t automatically better.
It makes the image larger, but it also narrows the field, makes vibrations more noticeable, and magnifies the effects of atmospheric turbulence.
You’ll have plenty of opportunities to experiment with higher power later.
For tonight, make things easy.
Finding Focus: Don’t Give Up Too Soon
You’ve found the Moon and centered it in the eyepiece.
But instead of a sharp, detailed surface, you see a bright blur.
The temptation is to turn the focusing knob a little, decide nothing has improved, and assume something is wrong.
Keep going.
The focuser may need considerably more movement before the image becomes sharp.
Turn the knob slowly while watching the view.
Look for the Moon’s edge to become clearer or a crater to come into focus.
Move slightly past the sharpest point, then turn back.
If you’re observing a star, an out-of-focus image may look like a pale disc or doughnut. As you approach correct focus, it should shrink towards a tiny point.
If you reach the end of the focuser’s travel without finding focus, check that the eyepiece is seated properly and that any required extension tube or adapter is fitted according to the manufacturer’s instructions.
Don’t force the mechanism.
Once you’ve achieved sharp focus, remember roughly where the focuser sits. It will make your next session easier.
Aligning the Finder: The Job That Saves the Most Frustration
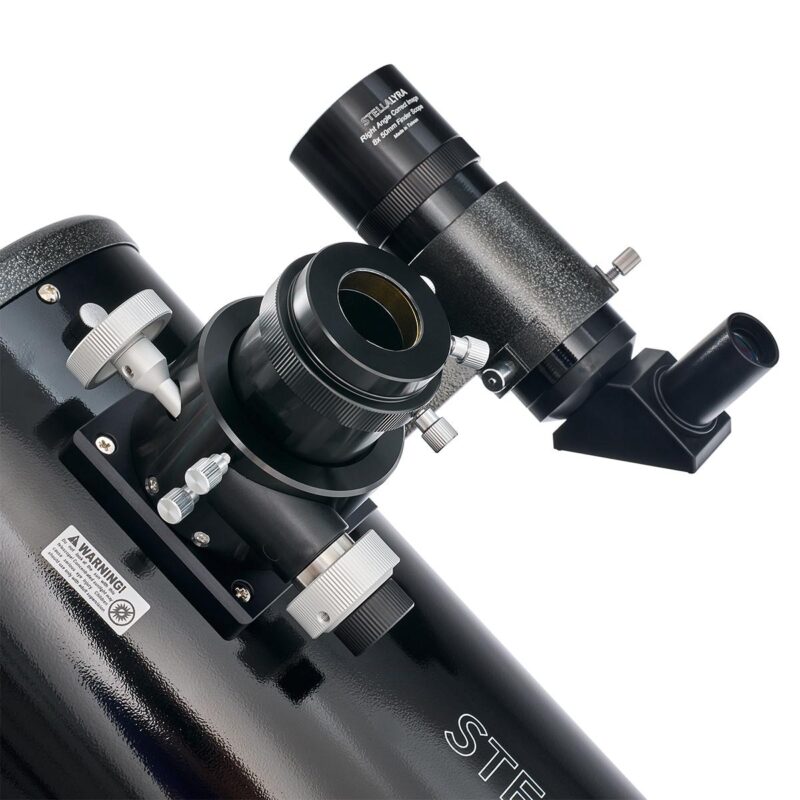
The finder is the small telescope or red-dot sight attached to your main instrument.
It helps you aim.
But if it isn’t aligned with the main telescope, you can spend half the evening searching for something that should have taken thirty seconds.
Do this in daylight.
Choose a distant stationary object, such as a rooftop aerial or sign, well away from the Sun.
Using your lowest-power eyepiece, center that object in the main telescope.
Now look through the finder.
If its crosshairs or red dot aren’t pointing at the same object, adjust the finder until they are.
Check the main telescope again and repeat if necessary.
At night, confirm the alignment using the Moon or another bright, easily recognized object.
When both instruments point at the same place, finding your next target becomes much simpler.
Do You Need to Collimat Your Telescope?
It means aligning the telescope’s mirrors.
Correct collimation helps the instrument produce sharp images, particularly at higher magnifications.
But don’t assume you need to adjust the mirrors on your first night.
If the Moon looks sharp and stars come into reasonable focus, get on with observing.
If the image remains poor after you’ve checked the focuser, allowed the telescope to cool, and considered the atmospheric conditions, consult the manufacturer’s instructions.
A collimation cap or a properly adjusted laser collimator can help.
The Apertura AD8 includes a laser collimator, but that doesn’t mean you need to use it every time you take the telescope outside.
Don’t start turning unfamiliar adjustment screws in the dark simply because the first view isn’t perfect.
Learn the procedure properly when you have time.
Your First Three Targets
There’s a sensible order to the objects you observe on your first night.
Start with something easy to recognize, then gradually challenge yourself.
1. The Moon: Your Best Starting Point
When the Moon is visible, it’s an ideal first target.
It’s bright, relatively easy to locate, and large enough to make focusing straightforward.
Start with your lowest-power eyepiece.
Once you’ve found the Moon and achieved sharp focus, examine the boundary between its illuminated and dark regions.
This is called the terminator.
Along this boundary, sunlight casts long shadows across craters, mountains, and valleys.
The shadows reveal details that can be harder to distinguish when the Moon is full.
Don’t rush to increase magnification.
Spend a few minutes exploring the surface at low power, then try a shorter focal-length eyepiece if the atmosphere is steady enough.
You’ll begin noticing features you missed at first glance.
2. Jupiter or Saturn: Your First Planet
A bright planet is a rewarding next step.
Jupiter appears as a small disc, and its four largest moons may look like tiny points arranged alongside it.
Under suitable conditions, you may also see darker cloud belts crossing the planet.
Saturn offers something quite different.
Its rings can be visible through many beginner telescopes, although their apparent tilt changes over time and affects how easily you can see them.
Neither planet will look enormous.
That’s why you should start at low magnification, center the planet, then gradually increase the power.
If the image becomes soft or unstable, return to the lower-power eyepiece.
A smaller, sharper planet is much more satisfying than a larger blur.

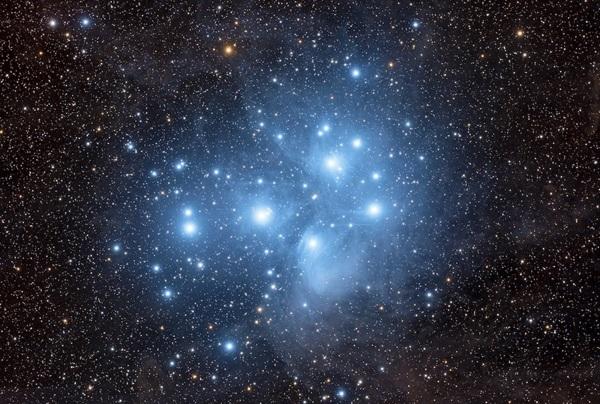
The Pleiades star cluster
3. The Pleiades: A Beautiful Star Cluster
The Pleiades, also known as the Seven Sisters, is one of the most recognizable star clusters in the night sky.
They make a great beginner target because their bright stars are easy to recognize.
But keep one important limitation in mind.
The Pleiades span roughly 1.8 degrees of sky. A typical 25mm, 52-degree eyepiece in a 1,200mm telescope shows only about one degree.
That eyepiece reveals the cluster’s bright central stars, not the entire group.
Binoculars or a suitable wide-field 2-inch eyepiece are better for appreciating the cluster as a whole.
The Apertura AD8 comes with a 30mm, 68-degree, 2-inch Super View eyepiece in its 1,200mm focal-length telescope, providing about 40× magnification and a much wider field than a typical 25mm Plössl.
It can frame the main cluster, although the Pleiades and their surroundings are particularly enjoyable through binoculars.
So if the Pleiades appear partly cut off in your eyepiece, your telescope is fine.
You’re simply looking at an object larger than your field of view.
What to Look for in November 2026
For beginners observing from the United States this November, the Moon, Saturn and the Pleiades provide three worthwhile targets.
Saturn is well placed for evening observing, while the Pleiades are becoming prominent in Taurus.
The Moon reaches first quarter on 17 November, making the surrounding evenings excellent for observing shadows along the lunar terminator.
On 24 November, the Full Moon passes close to the Pleiades, although the bright moonlight will make the cluster harder to appreciate.
Jupiter is also worth observing, though it’s better positioned late at night and toward morning in November.
You don’t need to observe all three in one evening.
Choose what’s available, give yourself time, and enjoy learning how to find it.
Let Your Eyes Adjust to the Darkness
When you first step outside, the sky may appear rather empty.
Give your eyes twenty to thirty minutes away from bright lights, and you’ll often start noticing fainter stars.
Full dark adaptation can take longer, but you don’t need to wait before starting.
Use a dim red torch if you need light to read a chart or change an eyepiece.
Avoid repeatedly looking at a bright phone screen.
Dark adaptation makes a bigger difference when observing faint stars, clusters, nebulae and galaxies than when looking at the bright Moon.
If you’re using a stargazing app, switch on its night mode and reduce the screen brightness.
Six First-Night Problems and How to Fix Them
Even after preparing carefully, something may not work the way you expected.
Before assuming the telescope is faulty, check these six common problems.
1. The Eyepiece Is Completely Black
Start with the obvious things.
Is the main telescope cover removed? Is the eyepiece properly fitted? Are you pointing at a tree, wall, or nearby building?
Return to your lowest-power eyepiece and try an easy target.
2. Everything Looks Blurry
Slowly adjust the focuser through its normal range.
Check that the eyepiece is seated correctly.
If the image remains soft, the telescope may still be adjusting to the outdoor temperature, or atmospheric turbulence may be affecting the view.
Try again at lower magnification.
3. The Finder Doesn’t Show the Object
The finder may be misaligned.
If it’s a red-dot finder, check that it’s switched on and working.
Return to an easily recognized target and align the finder with the main telescope.
Once they’re pointing at the same object, locating other targets becomes much easier.
4. The Object Keeps Moving Out of View
The Earth is rotating.
As a result, stars, planets, and other objects appear to drift across the sky.
With a manual Dobsonian, you’ll need to move the telescope gently to keep an object centered.
This feels awkward at first, but the movements soon become familiar.
A properly aligned computerized tracking mount can follow an object automatically.
5. The View Becomes Dim or Hazy
Dew may be forming on an exposed optical surface.
Check the eyepiece and the telescope’s front optical surfaces as appropriate.
If dew is a regular problem, a suitable dew shield or dew-control accessory may help.
Avoid wiping delicate optical surfaces in the dark.
6. Everything Shakes or Looks Washed Out
A shaky mount makes focusing and observing difficult.
Check that the telescope is on stable ground and that its components are properly secured.
Avoid observing through a closed window or directly over a roof releasing heat.
And remember that some nights have poor atmospheric seeing.
No telescope can produce perfectly sharp views through badly disturbed air.
What Not to Do on Your First Night
Avoid a few mistakes altogether.
Don’t begin with your highest-power eyepiece.
Don’t buy additional accessories before learning what your supplied equipment can do.
Don’t dismantle unfamiliar components or start adjusting mirrors without understanding the procedure.
Don’t expect every object to resemble an astronomy photograph.
And never point a telescope at or near the Sun. Solar observing requires specialized equipment and proper training. Ordinary sunglasses and improvised filters are not safe.
For now, concentrate on night-time observing.
Finally, don’t turn the evening into a test you have to pass.
If you’ve learned to focus, aligned the finder, and enjoyed one good view of the Moon, you’ve made a worthwhile start.
Tomorrow Night Will Be Easier
Your first night is about becoming comfortable with the equipment.
The second is about discovering how much you’ve already learned.
You’ll know which eyepiece to start with, how to adjust the focus, and how the telescope responds when you move it.
Return to an object you recognized the previous evening.
Then try something new.
Perhaps you’ll spend more time exploring the Moon, follow Jupiter’s moons over several nights, or begin recognizing the brighter star clusters.
You don’t need a different telescope every time you encounter a difficulty.
Often, you need another evening of practice.
And if you’re still researching your first telescope rather than using one, this guide should give you a clearer picture of what ownership actually involves.
The right telescope isn’t simply the one with the biggest advertised magnification.
It’s one you can comfortably set up, aim, focus, and enjoy using.
Haven’t Bought Your First Telescope Yet? Three Worth Considering
Understanding the first night makes the buying decision easier.
For most beginners interested in visual astronomy, I favor a stable, straightforward telescope with enough aperture to make the Moon, planets, and brighter deep-sky objects rewarding.
Here are three choices, each suited to a different priority.
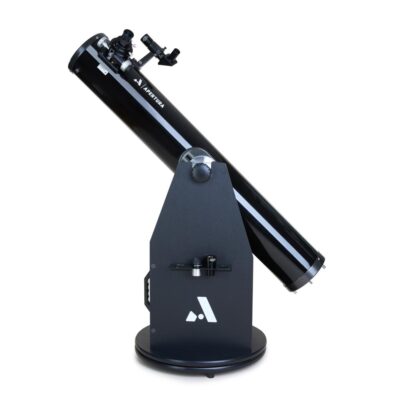
 Apertura AD8: Our Top Pick for Beginners
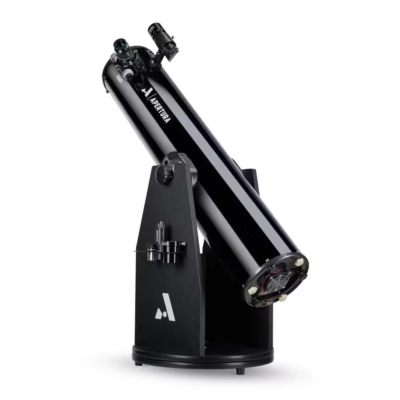
The Apertura AD8 8-inch Dobsonian offers generous light-gathering power, a stable manual mount, and useful included accessories, including a 30mm wide-field eyepiece. It’s our top pick for beginners who want strong visual performance and have the space and ability to handle a full-sized Dobsonian.
Listed price: US$699.95
Apertura AD6: The Smaller, More Affordable Alternative
It’s a sensible choice when the AD8’s extra size, weight, or cost makes it less practical.
Listed price: US$499.95
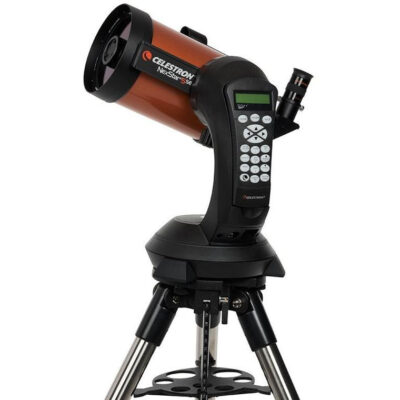
Celestron NexStar 5SE: Finds Things for You
The Celestron NexStar 5SE uses a computerized GoTo mount that locates and tracks selected objects after setup and alignment. Consider it if you value computer-assisted object finding and are comfortable learning the electronic controls.
Listed price: US$1,475.85
Which Would I Choose?
For most beginners with suitable storage space who can comfortably move the equipment, the AD8 remains our top recommendation. But a telescope that’s too heavy or awkward to use regularly isn’t the right purchase, no matter how impressive its specifications. If you want to compare the designs, practical limitations, and costs before deciding, read our complete guide to choosing your first telescope. You can also explore our Start Your Stargazing Journey page for beginner telescope recommendations and equipment choices.
Affiliate disclosure: White Star Outdoors may earn a commission when you purchase through our High Point Scientific links, at no additional cost to you. Prices and availability can change, so check the retailer’s current listing before purchasing.
One Good View Is Enough to Begin
Your first night doesn’t have to be spectacular. You don’t need to find a distant galaxy, identify every constellation or master every control. Start with one recognizable object. Learn how to bring it into focus. Spend enough time looking to notice something you hadn’t seen before. Then go outside again another evening because the most rewarding part of owning a telescope isn’t what happens in the first twenty minutes. It’s what becomes possible once you know how to use it.
Take It Outside With You
If you’d like the shorter version to have in your hand on the night, my free guide, Your First Night Out, walks you through finding the Moon and the bright planets, and it needs no equipment at all while your eyes adjust.
Send me Your First Night Out.

Explore beginner telescopes, binoculars, and the best stargazing apps for beginners here: