How to Use a Telescope
Learn how to use a telescope the right way. This easy guide walks beginners through setup, aiming, focusing, and tracking—all without frustration. You’ve finally bought a telescope.
You’ve unpacked it, assembled it, and waited for a clear night. The stars are out. The Moon is up. The excitement builds… and then the confusion starts.
Where do you point it?
How do you focus it?
Why is everything so blurry?
Don’t worry — this is where most beginners get stuck. Not because telescopes are difficult, but because no one ever walks you through the basics. This guide does exactly that.
Here’s how to use a telescope for the first time without frustration or guesswork.
What You Need Before You Begin
Make sure you have everything you need for a smooth first night:
- Your telescope, fully assembled and balanced
- A low-power eyepiece (usually 25mm or 20mm)
- A red flashlight to preserve night vision
- A star chart or app like Stellarium or SkySafari
- A stable, dark spot with a wide view of the sky
Optional but helpful:
- Moon filter (reduces glare)
- Collimation cap (for reflector users)
- Stargazing log sheet to track your sessions
How To Use A Telescope in 5 Easy Steps
Step 1: Set Up in a Safe, Stable Spot
Choose a flat, open area. Avoid sidewalks or decks that vibrate. Make sure your mount or tripod is level and secure.
If you brought your telescope outside from indoors, let it sit for 10 to 15 minutes so the optics can adjust to the outside temperature. This will greatly improve image clarity.
Face away from streetlights or house lights to reduce glare, and dim any nearby lights if possible.
Step 2: Align the Finder Scope or Red Dot Finder
Most telescopes come with a small scope or red dot finder mounted on top. Before you can use it to find stars, it needs to be aligned.
Do this during the day:
- Point your telescope at a distant, unmoving object (like a tree, pole, or antenna).
- Look through the main eyepiece and center that object.
- Now look through your finder and adjust its screws until the object is centered there as well.
This step is critical. It makes nighttime navigation 10 times easier.
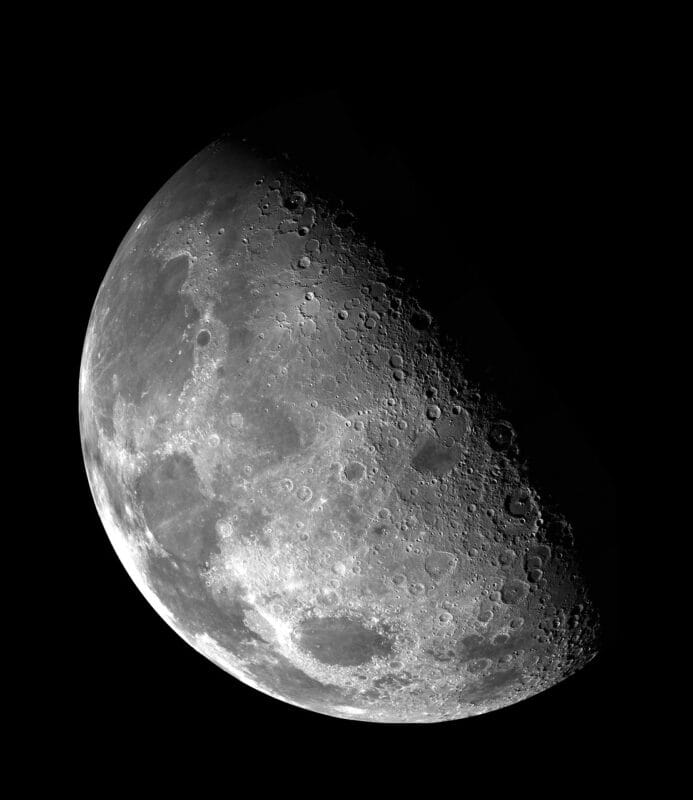
Step 3: Choose a Bright Target (Like the Moon or a Planet)
Start simple. The Moon is the easiest and most satisfying object for beginners. It’s bright, easy to find, and full of detail.
- Use your finder to aim the telescope
- Insert your lowest-power eyepiece (higher mm = lower magnification)
- Slowly adjust the focus knob until the image is crisp
Avoid high magnification at first. You want clarity, not Zoom. As a beginner, less is more.
Step 4: Learn to Track Objects
The Earth rotates, which means everything in the sky appears to move.
- Alt-azimuth mounts move up/down and left/right. Simply adjust as needed.
- Equatorial mounts require alignment with Polaris and move in an arc.
Don’t stress over perfection here—just nudge gently as needed.
Practice keeping the Moon or a star in view. It gets easier with time.
Step 5: Observe With Patience
Don’t try to observe everything on night one. Focus on one or two bright targets.
Let your eyes adjust. Make small adjustments. Take a breath between every move. You’re not in a rush. You’re building a skill.
Common Beginner Mistakes to Avoid
- Using high magnification too early
- Skipping the finder alignment step
- Not allowing the scope to cool down
- Expecting Hubble-style images
- Trying to find too many objects at once
Remember, every expert stargazer started exactly where you are.
Final Tips On How To Use A Telescope for Your First Night
- Use a red flashlight so you don’t lose night vision
- Dress warm—nights can get cold fast
- Have a backup target in case clouds roll in
- Set realistic expectations and enjoy the moment
Ready to Equip Your Scope for Success?
👉 Check Out the Best Telescope Accessories for Beginners
You don’t need to be an expert to enjoy the night sky. You just need a good start. Now you know how to use a telescope
You’ve got this!
Clear skies!