First Telescope Budget
Discover how much to spend on your first telescope, what different budgets offer, and how to choose the best telescope for your money.
Most people who ask how much to spend on their first telescope already have a number in mind.
Sometimes it’s the price they noticed on a telescope box in a shop. Sometimes it’s an amount that seemed reasonable before they discovered just how much telescope prices vary.
Then the questions begin. Is a US$150 telescope good enough? Will spending US$500 make a noticeable difference? And if an 8-inch telescope costs several hundred dollars more than a smaller model, what exactly are you paying for?
The good news is that telescope prices follow a fairly understandable pattern. Once you know what makes one telescope more capable than another, it becomes much easier to decide where your money will do the most good.
You don’t need the most expensive equipment to enjoy astronomy. But buying the cheapest telescope you can find isn’t necessarily a saving either.
The aim is to find a telescope that provides satisfying views, is comfortable to use, and encourages you to spend more evenings exploring the night sky.
The Short Answer: What Should a Beginner Spend?
For many beginners, a budget of approximately US$300–$500 provides a worthwhile starting point. This range includes capable tabletop Dobsonian telescopes and some larger entry-level instruments.
If you have the space, can comfortably handle a larger telescope, and want an instrument you can continue using as your experience grows, spending approximately US$500–$700 on a full-size 6-inch or 8-inch Dobsonian is worth considering.
These are planning ranges, not fixed rules. Actual prices and availability vary.
A 6-inch or 8-inch Dobsonian is often recommended because much of the purchase price goes towards the two things that matter most for visual observing: a reasonably large mirror and a stable, straightforward mount.
Spending less is perfectly possible, particularly if you begin with binoculars or a compact tabletop telescope. Spending more may also make sense, but the benefits depend on what you want to observe and how you’ll use the equipment.
Before deciding on a number, it helps to understand what you’re actually buying.
1. What Makes One Telescope Cost More Than Another?
Think of a telescope as a light collector.
Its job is to gather light from distant objects and bring that light into focus so your eye can examine the image.
The diameter of the main lens or mirror is called the aperture. Generally, a larger aperture gathers more light, allowing you to observe fainter objects and potentially resolve finer detail.
For example, an 8-inch mirror gathers approximately 78% more light than a 6-inch mirror, assuming comparable optical efficiency.
That difference can matter when observing globular star clusters, faint nebulae, and galaxies. A larger aperture can also reveal finer planetary detail when atmospheric conditions allow.
But aperture isn’t the only consideration.
A telescope also needs a mount that holds it steady and allows you to point it smoothly.
An instrument with excellent optics can become frustrating if its tripod shakes every time you adjust the focuser. At higher magnifications, even small vibrations become obvious.
Then there are the eyepieces, finder, focuser and other accessories. Their quality and usefulness affect the overall experience.
Some more expensive telescopes also include motors and computerized object-finding or tracking systems. These features can be useful, but they add cost without necessarily increasing the amount of light the telescope gathers.
That’s why comparing telescopes by price alone can be misleading.
The best value comes from the combination of useful aperture, stable mounting, and practical ease of use.

2. What Each Telescope Budget Can Realistically Buy
Let’s look at the main price ranges and what a beginner can expect from each.
Under US$150: A Modest Start, but Choose Carefully
At the lower end of the market, you’ll find small refractors, compact reflectors, and packages advertised with impressive magnification figures.
Some inexpensive telescopes can show lunar craters, Jupiter’s brightest moons and Saturn’s rings under suitable conditions.
The problem is that low-cost packages often compromise on mounts and accessories.
A small telescope mounted on a lightweight tripod may shake whenever you touch it. The finder may be awkward to align, and the supplied eyepieces may offer limited useful magnification.
That can turn what should be an enjoyable first night into an exercise in frustration.
Be especially cautious of packaging that promotes magnifications such as 400× or 600× without explaining the telescope’s aperture and optical limitations.
Magnification alone doesn’t create detail. Beyond a telescope’s useful limits, increasing magnification produces a larger, dimmer, or blurrier image.
For someone with less than US$150 to spend, a decent pair of binoculars may offer better value than a poorly mounted telescope.
We’ll return to that option shortly.
US$150–$300: Compact Telescopes and Better Possibilities
This is where some useful tabletop Dobsonian telescopes become available.
A tabletop Dobsonian uses a short reflecting telescope on a compact, manually operated base rather than a conventional tall tripod.
The design can offer good stability for the price, as long as the telescope sits on a sturdy surface.
With a suitable model, beginners can enjoy detailed lunar views, observe Jupiter’s moons and main cloud belts, see Saturn’s rings, and explore brighter star clusters.
The main compromise is usually aperture, although some models also have basic focusers or limited accessories.
Another consideration is where you’ll place the telescope.
A tabletop Dobsonian needs a stable table, stand, or platform at a comfortable observing height. A wobbly garden table can undermine the stability that makes the design attractive.
This price range can offer good value, but it still pays to compare the complete instrument rather than choosing by mirror size alone.
US$300–$500: A Strong Starting Point for Many Beginners
For many people, this is where telescope buying becomes especially interesting.
You can begin considering capable tabletop Dobsonians with larger apertures and, depending on current pricing, some full-size instruments.
One example is the Sky-Watcher Heritage 130, a tabletop Dobsonian with a 130 mm primary mirror and a 650 mm focal length.
Its relatively generous aperture makes it suitable for observing the Moon, planets, and brighter deep-sky objects.
The collapsible optical tube helps reduce its storage size, although the telescope still needs a stable support. Its open-tube design also means stray light can sometimes be an issue in brightly lit observing locations.
For someone with limited storage space or a preference for compact equipment, this style of telescope can be an attractive compromise.
The key advantage of this budget range is that you can start prioritizing performance and usability rather than accepting every compromise imposed by a very low price.
However, spending US$400 doesn’t automatically guarantee a better experience than spending US$300.
The telescope still needs to suit your observing location, available storage space, and ability to set it up comfortably.
US$500–$700: Full-Size Dobsonians and Long-Term Value
If you’re confident that you want to pursue visual astronomy, this is a particularly worthwhile range to investigate.
A full-size 6-inch or 8-inch Dobsonian can provide enough optical capability to keep an enthusiastic observer occupied for years.
These telescopes generally use a Newtonian reflector mounted on a simple rotating base. You move the instrument manually to follow objects across the sky.
Because the mount is mechanically straightforward, a substantial portion of the purchase price can go towards the optics rather than electronics.
A 6-inch Dobsonian can provide detailed lunar views, Jupiter’s cloud belts, Saturn’s rings, brighter nebulae and numerous star clusters.
An 8-inch model gathers more light, helping reveal fainter objects and potentially finer detail under favorable conditions.
There are trade-offs.
Full-size Dobsonians require more room than tabletop models. Their optical tubes and bases are also heavier, so storage and transport matter.
If you can move and store one comfortably, this category offers a strong combination of optical performance and simplicity.
Above US$700: More Capability, but Not Always More Convenience
Spending beyond this range opens the door to larger Dobsonians, computerized mounts, tracking systems and more specialized equipment.
These can be excellent instruments, but the extra cost may add weight, setup requirements, or technical complexity.
A larger Dobsonian gathers more light, but may be difficult to transport.
A computerized telescope may locate and track objects automatically, but it generally needs power, alignment and some familiarity with its controls.
A smart telescope may capture and process digital images rather than provide the traditional experience of looking through an eyepiece.
None of these features is inherently undesirable. They solve different problems.
Before paying for them, it’s worth discovering which parts of astronomy you actually enjoy.
For a first telescope, simplicity can be a genuine advantage.
3. Why the Cheapest and Most Expensive Telescopes Can Both Be Poor Starting Points
The cheapest telescope can cost you something more valuable than money: your enthusiasm.
Imagine spending an evening trying to find Saturn through a telescope that shakes whenever you touch it. The finder is difficult to use, the image won’t stay steady, and every adjustment seems to make things worse.
The problem may not be your ability to learn astronomy. It may be the equipment.
An inexpensive telescope with a weak mount can make ordinary beginner tasks unnecessarily difficult.
That’s one reason we covered common buying mistakes in The Hobby Killer: How to Spot a Telescope That Will End the Hobby.
But spending too much can create a different problem.
A large, expensive telescope may deliver impressive views, yet become inconvenient if it takes too much effort to carry outside, assemble, or transport.
Perhaps you have to move it down several flights of stairs. Perhaps its base occupies too much room in the garage. Or perhaps you discover that most evenings you only have half an hour to observe.
A telescope that is difficult to use regularly can become an expensive piece of equipment that rarely sees the night sky.
The best first telescope is not necessarily the largest or most expensive. It’s the one that gives you satisfying views without making observing feel like a chore.
That is why portability, storage, and setup deserve just as much consideration as aperture.
4. Where Your Money Often Goes Furthest: Three Telescopes Worth Comparing
Once you understand the price ranges, it helps to look at actual telescope designs.
Three models illustrate the choices available to beginners.
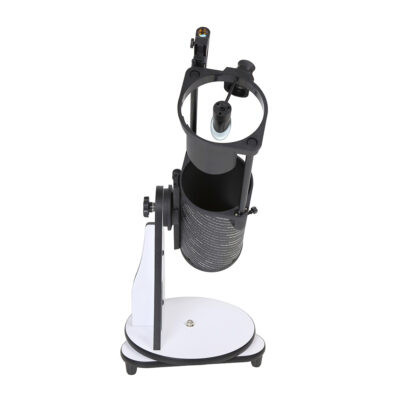
 Sky-Watcher Heritage 130: Compact and Capable
 Sky-Watcher Heritage 130: Compact and Capable
The Heritage 130 is worth considering if you want a useful aperture without committing to a full-size telescope.
Its 130 mm mirror provides enough light-gathering ability for rewarding observations of the Moon, bright planets, and many brighter deep-sky targets.
The collapsible design makes it relatively convenient to store and transport.
However, it isn’t a freestanding telescope. You’ll need a stable surface, and the compact design involves some compromises compared with a full-size Dobsonian.
It is particularly appealing to beginners who value portability and have limited storage space.
View the Heritage 130 at High Point Scientific
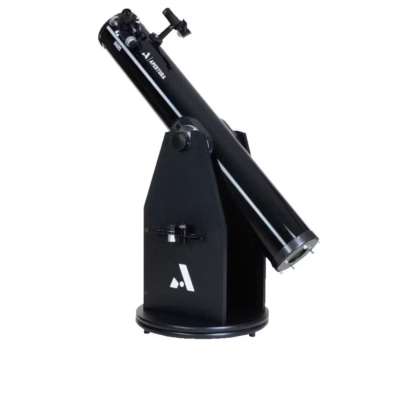
Apertura AD6: A Sensible Full-Size Starting Point
 Apertura AD6: A Sensible Full-Size Starting Point
The Apertura AD6 is a 6-inch Dobsonian with a 152.4 mm primary mirror and a 1,200 mm focal length.
Its combination of aperture, stable mounting, and straightforward operation makes it a strong option for someone who wants to concentrate on visual astronomy.
The Moon is an excellent target for this telescope. Along the lunar terminator, where sunlight meets shadow, crater rims, mountain ranges, and other surface features become particularly interesting.
Jupiter’s cloud belts and its four large Galilean moons are also accessible targets, while Saturn’s rings remain one of the most memorable sights for beginners.
Under darker skies, the AD6 can reveal many star clusters, brighter nebulae, and some galaxies.
The trade-off is size.
The telescope has a substantial optical tube and a separate base. Although you can move the two parts individually, you’ll need a suitable place to store them.
If you have the space and can handle the equipment comfortably, a 6-inch Dobsonian can provide years of enjoyable observing.
View the Apertura AD6 at High Point Scientific
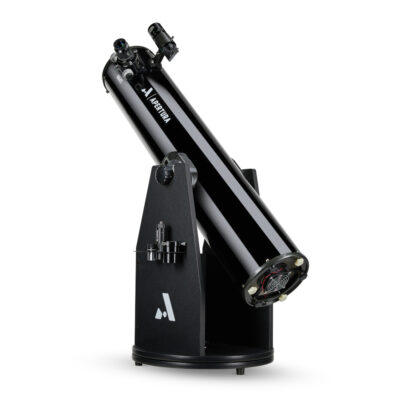
Apertura AD8: More Light for Fainter Objects
 Apertura AD8: More Light for Fainter Objects
The Apertura AD8 takes the same basic approach but increases the primary mirror diameter to 203.2 mm.
Compared with a 6-inch mirror, the 8-inch aperture gathers approximately 78% more light.
That additional light is particularly useful for faint deep-sky objects.
Under favorable conditions, some globular clusters reveal more individual stars, certain nebulae become easier to examine, and faint galaxies may show additional structure.
The larger aperture also offers greater potential resolution when observing the Moon and planets, although atmospheric turbulence can limit how much of that advantage is visible on a particular night.
The AD8 is heavier and bulkier than the AD6.
If you need to move the telescope frequently or store it in a confined space, that difference matters.
If you have suitable storage, can transport it comfortably, and are particularly interested in faint objects, the extra aperture may justify the additional cost.
View the Apertura AD8 at High Point Scientific
For a detailed comparison of the two full-size models, read 6-Inch vs 8-Inch Dobsonian Telescope: Which Should a Beginner Choose?.
What About a Computerized Telescope?
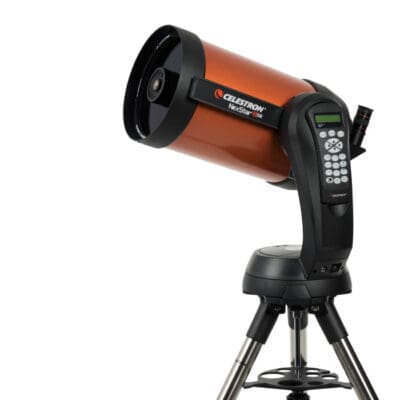
A telescope such as the Celestron NexStar 5SE offers a different approach.
Instead of relying entirely on manual pointing, it uses a computerized mount that can locate and track selected objects after you align the telescope.
That can help beginners who find manual object finding difficult or want tracking during longer observing sessions.
However, the 5SE has a smaller aperture than the AD6 or AD8, and part of its price covers the electronics and motorized mount.
It also needs a suitable power supply and an alignment procedure before automatic object finding can work properly.
The choice is therefore not simply between a cheaper and more expensive telescope.
It’s a choice between priorities: more aperture for visual observing, or added convenience through computerized control.
If you’re primarily interested in looking through an eyepiece and learning the sky, a manual Dobsonian is often a compelling place to begin.
5. What Should You Budget for Beyond the Telescope?
The price on the telescope box isn’t always the full cost of getting started.
Fortunately, most beginners don’t need to buy a large collection of accessories immediately.
A few simple items can make observing more comfortable and enjoyable.
A Dim Red Torch
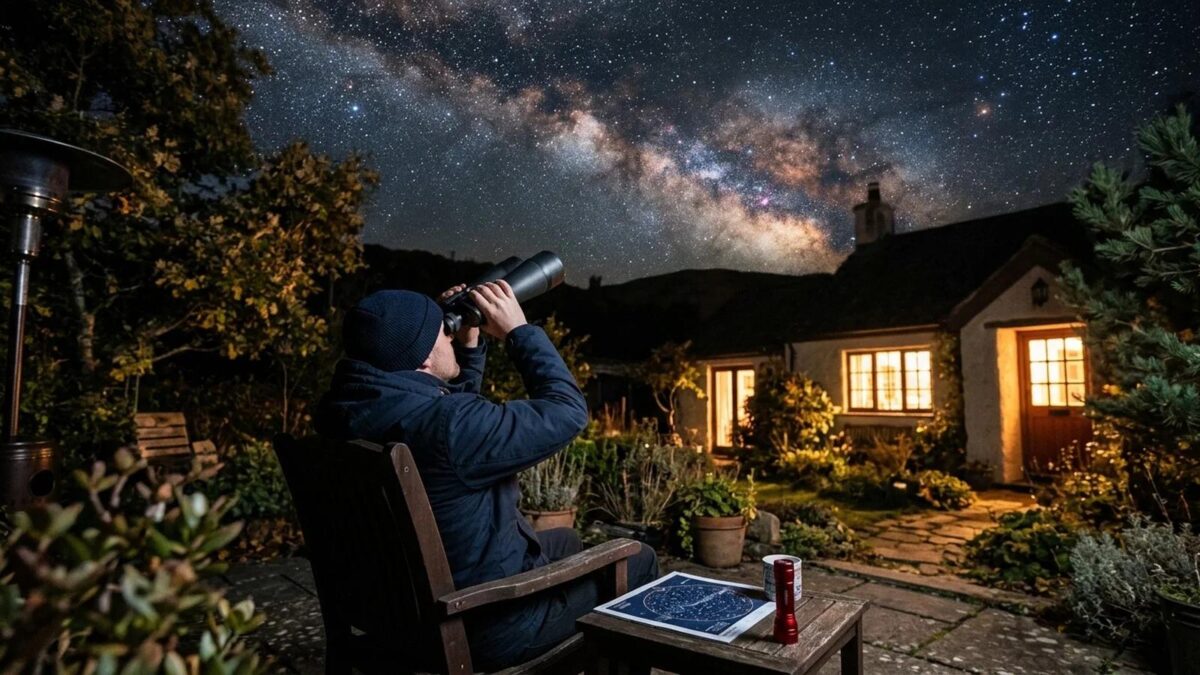
A dim red torch or headlamp helps you read charts and handle equipment without disrupting your dark adaptation as much as bright white light.
Keep it as dim as practical. Even a very bright red light can affect your night vision.
A phone with an appropriate red-screen setting may be useful, but keep screen brightness low.
A Star Chart or Astronomy App
Learning where to look is part of the enjoyment of astronomy.
A paper star chart or a free planetarium app such as Stellarium can help you identify constellations, planets, and other targets.
You don’t need expensive software to begin.
A Comfortable Chair and Warm Clothing
This may sound less exciting than a new eyepiece, but comfort makes a substantial difference.
Astronomy often involves spending time outside when temperatures fall. A warm jacket, suitable footwear, and a comfortable observing position can help you stay outside long enough to appreciate what you’re seeing.
An adjustable observing chair is useful, but it doesn’t have to be your first purchase.
Additional Eyepieces
Most beginner telescopes include one or more eyepieces.
Start with what comes in the box.
Once you’ve spent time observing, you’ll have a better idea of whether you want a wider field of view, a different magnification, or improved viewing comfort.
Buying additional eyepieces before understanding your telescope’s capabilities can be unnecessary.
A Stable Support for Tabletop Telescopes
If you choose a tabletop Dobsonian, make sure you have a suitable place to put it.
A sturdy platform at the right height can be essential.
You may already own something suitable, but it’s worth considering before purchasing the telescope.
Power for Computerized Equipment
Motorized telescopes may need batteries, an external power pack or a mains power adapter.
Check the manufacturer’s requirements and what’s included.
An instrument that relies on electronics can become unusable if you arrive at an observing location without adequate power.
Storage, Transport and Delivery
Think about where the telescope will be kept and how you’ll move it.
If you plan to travel to darker skies, consider whether the optical tube and mount will fit safely in your vehicle.
Readers buying from overseas should also account for shipping, currency conversion, import duties and applicable taxes.
For Australian readers in particular, a US retailer’s advertised price may differ substantially from the final delivered cost.
The good news is that you don’t need to purchase every accessory immediately.
A telescope, its included eyepieces, a suitable finder and a comfortable place to observe are enough to begin.
6. Can You Get Better Value From a Second-Hand Telescope?
Buying used equipment can be a sensible way to stretch your budget.
Astronomy enthusiasts sometimes sell well-maintained telescopes when upgrading to larger instruments or changing their observing interests.
A used telescope from a knowledgeable owner may offer better value than a new instrument at a similar price.
However, condition matters.
Check that the mount moves smoothly, the focuser operates properly, and the optics show no obvious damage.
A small amount of dust on a mirror is usually less serious than damaged coatings, deep scratches, or signs of poor storage.
Make sure the essential accessories are included, particularly eyepieces, the finder, and any parts needed to assemble the mount.
For a Newtonian reflector, ask whether the mirrors can be aligned correctly and whether the adjustment mechanisms work.
If possible, inspect the telescope in person and ask for a demonstration.
Local astronomy clubs can be particularly helpful. Members may be familiar with the equipment and able to offer practical advice about its condition and suitability.
A second-hand bargain is only a bargain if the telescope works properly and suits your needs.
7. What If Your Budget Is Smaller Than the Price of a Good Telescope?
A smaller budget doesn’t mean you have to miss out on astronomy.
You can explore the night sky in meaningful ways without buying a full-size telescope.
 Start With Binoculars
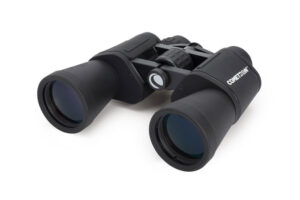
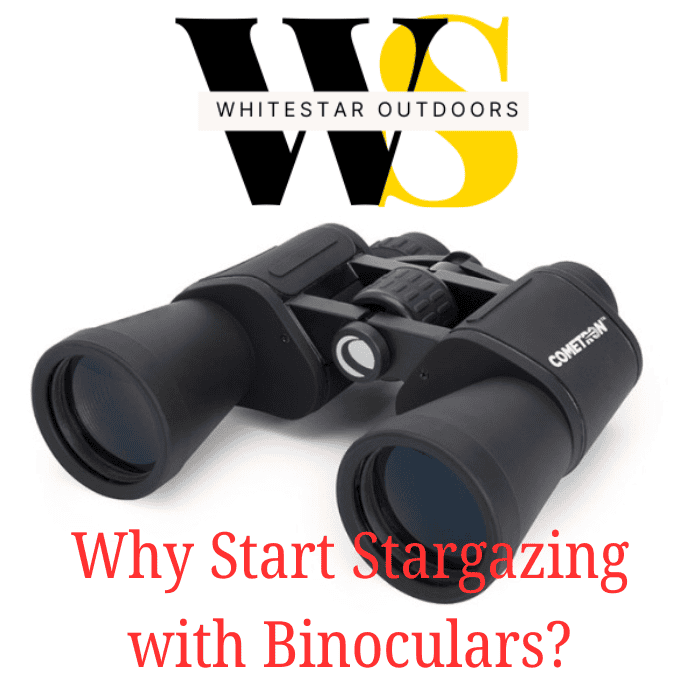
A reasonably good pair of 7×50 or 10×50 binoculars can reveal a surprising amount.
You’ll be able to explore rich star fields, bright open clusters and larger lunar features.
Under suitable conditions, binoculars can also reveal some of Jupiter’s brightest moons as tiny points of light, although separating them from the planet can be challenging with handheld equipment.
Ordinary binoculars won’t provide the magnified planetary views available through a telescope, but they offer a wide field of view and are easy to take outside.
They also remain useful after you’ve purchased a telescope.
View the Celestron 7×50 Binoculars at HighPointScientific
Learn the Sky With Your Own Eyes
There’s plenty to discover without any equipment.
You can learn to recognize bright stars and constellations, follow the Moon through its phases and identify the brighter planets.
From a sufficiently dark location, you may also see the Milky Way stretching across the sky.
Learning these landmarks makes it easier to find objects when you eventually begin using a telescope.
Our free guide, What You Can See in the Night Sky Without a Telescope, is designed to help beginners get started.
Save for the Telescope You Really Want
There’s nothing wrong with waiting a few months before buying.
In fact, the time spent learning the sky may help you make a better decision.
You might discover that planetary observing interests you most, or that you particularly enjoy finding star clusters and nebulae.
You may also learn that portability matters more to you than maximum aperture.
The more clearly you understand your interests, the easier it becomes to spend your money wisely.
8. How Much Difference Does Your Observing Location Make?
Before committing to a larger telescope, consider where you’ll use it.
A telescope in a brightly lit suburb faces different conditions from one used under a dark rural sky.
Light pollution brightens the background sky, reducing the contrast of faint galaxies and nebulae.
A larger telescope still gathers more light, but it cannot remove the effects of light pollution.
The Moon and bright planets are less affected by skyglow, making them particularly rewarding targets for suburban observers.
Atmospheric conditions also matter.
On nights when the air is turbulent, planetary detail may appear to shimmer or blur, even through a large telescope.
A smaller telescope used on a steady night can provide a more satisfying planetary view than a larger instrument used in poor conditions.
This is another reason not to judge telescopes solely by their aperture.
If you intend to observe mainly from home, consider the objects realistically accessible from your location.
If you regularly travel to dark-sky sites, portability and vehicle space become important considerations.
Your observing location should help shape your budget, not simply be an afterthought.
9. How to Choose a Budget You’ll Feel Good About
After comparing prices, telescope designs, and observing requirements, you should be able to narrow your decision.
The following table summarises the main choices.
| Budget (US dollars) | What to Consider | Main priority |
|---|---|---|
| Under $150 | Binoculars or carefully selected basic equipment | Avoid poor mounts and exaggerated claims |
| $150–$300 | Compact and entry-level tabletop telescopes | Stability, aperture and included accessories |
| $300–$500 | Capable tabletop Dobsonians and selected larger models | Balance of performance and convenience |
| $500–$700 | Full-size 6-inch and some 8-inch Dobsonians | Greater aperture and long-term observing value |
| Above $700 | Larger, computerised or specialised telescopes | Features that match specific observing goals |
These figures are broad guidelines, not fixed retail price categories.
To make your final decision, ask yourself four questions.
What do I most want to observe?
The Moon and planets? Bright star clusters? Faint galaxies? Your interests influence how much aperture you need.
Where will I use the telescope?
A backyard, balcony, rural property or dark-sky location can affect which instrument is practical.
How easily can I store and move it?
A telescope that is comfortable to handle is more likely to become part of your regular routine.
What can I comfortably afford?
Choose a budget that leaves room for any essential extras without feeling pressured to purchase features you don’t need.
For many beginners, the answers point towards a capable tabletop telescope or a straightforward 6-inch Dobsonian.
For others, an 8-inch model may be worth the additional cost.
And for someone still exploring their interest in astronomy, binoculars may be the most sensible first purchase of all.
Final Thoughts: Buy the Telescope You’ll Want to Use
The right amount to spend on your first telescope isn’t necessarily the lowest price you can find, and it certainly isn’t the highest amount you’re willing to pay.
It’s the amount that buys a telescope capable of showing you the objects you’re interested in, on a mount that works properly, in a size you can comfortably manage.
A stable, easy-to-use telescope with a modest aperture can provide years of enjoyment.
A larger telescope can reveal more, particularly when observing faint objects under dark skies, but those advantages matter only if you’re willing and able to use it regularly.
And if your budget isn’t ready for the telescope you want, there’s plenty to enjoy while you save.
Learn the constellations. Follow the Moon. Explore bright star clusters through binoculars. Spend time becoming familiar with the night sky.
When you eventually choose your telescope, you’ll have a much clearer idea of what you want it to do.
The best first telescope is the one that makes you want to go outside and observe again next week.
If you’re ready to compare telescope designs, continue with our guide to Choosing Your First Telescope.
Or, if you’re considering a full-size Dobsonian, explore our 6-Inch vs 8-Inch Dobsonian Telescope Comparison to see which size better suits your needs.
Explore beginner telescopes,binoculars and best stargazing apps for beginners here:
Affiliate disclosure: White Star Outdoors may earn a commission from qualifying purchases made through some retailer links in this article, at no additional cost to you. Recommendations are based on published product specifications, established astronomical principles and practical buying considerations. They should not be interpreted as claims that every model has been personally tested.
Price note: All budget figures are in US dollars and are intended as general buying guidance. Check current retailer prices, availability, delivery costs and taxes before purchasing.