Dobsonian Telescope Collimation
Your Dobsonian telescope should show sharp stars and satisfying views of the Moon and planets. If everything looks slightly blurry, the mirrors may need a simple adjustment called collimation. But before reaching for a screwdriver, check a few things.
You’ve carried your Dobsonian outside, found Jupiter or the Moon, and carefully turned the focus knob. Yet something isn’t right. The image looks soft, and no amount of focusing seems to make it properly sharp.
It’s frustrating, particularly when you’ve been looking forward to a clear night.
One possible explanation is that your telescope’s mirrors are slightly out of alignment. This is called collimation, and it’s a normal part of owning a Newtonian reflector telescope, including a Dobsonian.
The good news is that collimation is usually straightforward once you understand what you’re adjusting. It doesn’t mean your telescope is damaged, and it certainly doesn’t mean you’ve bought the wrong one.
First, is collimation really the problem?
Not every blurry telescope view is caused by misaligned mirrors.
Before making any adjustments, consider four common possibilities.
The telescope hasn’t cooled down. A Dobsonian brought outside from a warm house may need time to reach the surrounding air temperature. Until then, warm air moving inside the tube can soften the image.
The atmosphere is unsteady. Even on a cloudless night, turbulence can make Jupiter, Saturn, and the Moon appear to shimmer. Astronomers call this poor seeing. Adjusting your mirrors won’t fix the atmosphere.
You’re using too much magnification. A high-power eyepiece enlarges the image, but it also makes atmospheric disturbances and focusing errors more noticeable.
Try your lowest-power eyepiece first.
The focus isn’t quite right. Slowly turn the focuser through its sharpest position rather than expecting the image to improve continuously in one direction.
If the view remains noticeably soft after these checks, particularly at higher magnification, it’s worth checking collimation.
What is telescope collimation?
Collimation means aligning the mirrors inside your telescope so that light follows the correct path to your eyepiece.
A typical Dobsonian uses two mirrors.
The primary mirror
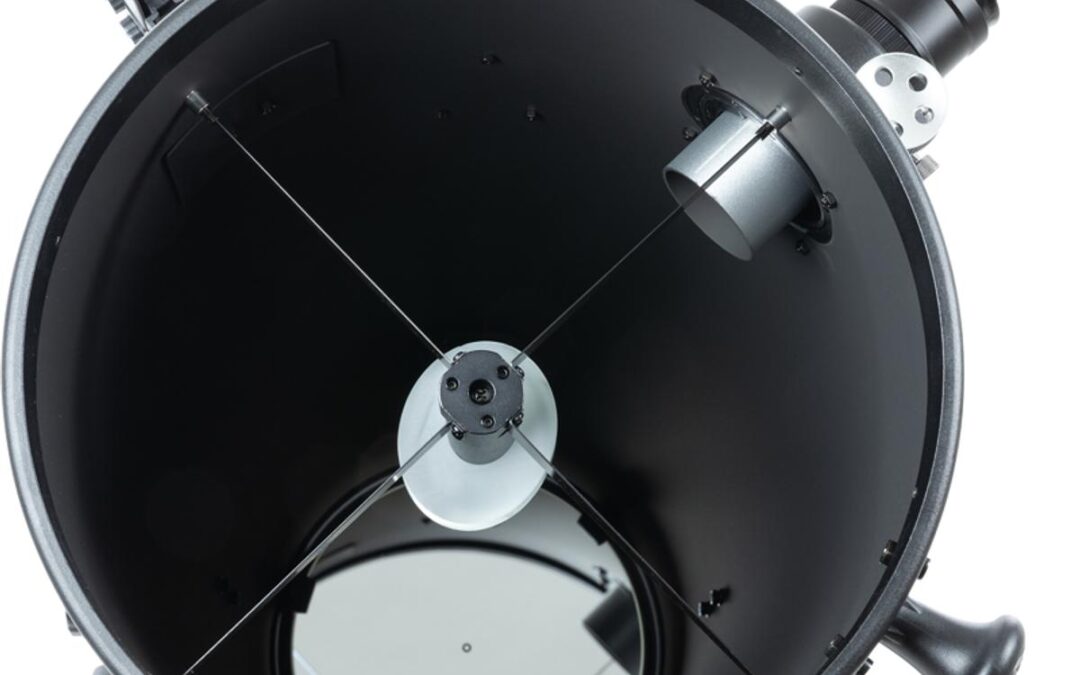
The primary mirror is the large, curved mirror at the bottom of the telescope tube.
Its job is to collect light from distant objects and reflect it towards the smaller mirror near the top.
The primary mirror is responsible for most of the telescope’s light-gathering ability. Its alignment is particularly important when you’re trying to see fine details on planets.
The secondary mirror
The secondary mirror is the smaller, flat, angled mirror near the open end of the telescope.
It’s held in place by thin supports called a spider.
Its job is to redirect the light coming from the primary mirror sideways into the focuser, where your eyepiece sits.
The secondary mirror isn’t there to magnify anything. It simply directs the light towards your eye.
When these two mirrors are properly aligned, your Dobsonian has the best chance of producing the sharp image its optics can deliver.
If they’re misaligned, fine details can become less distinct, even when you’ve focused carefully.
How to check your Dobsonian’s collimation with a star test
One useful way to check your telescope’s alignment is to examine a star’s image.
This is called a star test.
You don’t need to dismantle the telescope, and you can begin without buying another accessory.
Step 1: Allow the telescope to cool
Set your Dobsonian outside and give it time to adjust to the outdoor temperature.
Depending on the telescope’s size and the temperature difference, this may take half an hour or considerably longer.
Choose a night when the stars appear reasonably steady rather than flickering wildly.
Step 2: Find a reasonably bright star
Choose an isolated, moderately bright star positioned fairly high above the horizon.
A star low in the sky is viewed through more atmosphere, making the test less reliable.
Start with a low-power eyepiece to locate the star, then switch to a higher-power eyepiece.
Keep the star centered in the field of view.
Step 3: Move slightly out of focus
Slowly turn the focus knob until the star becomes a small, out-of-focus disc.
You may notice a darker central area caused by the secondary mirror and, under suitable conditions, a series of circular rings.
Don’t defocus so far that the star becomes an enormous disc. A small amount of defocusing is more useful for checking fine alignment.
Step 4: Look at the rings
In a well-collimated telescope, the pattern should appear reasonably circular and concentric, with the rings centered around one another.
Think of a small bullseye.
If the pattern is consistently lopsided while the star is centered in the eyepiece, your telescope may need adjustment.
Check on both sides of focus if possible.
One important detail: Always keep the star centered. A star near the edge of the eyepiece can appear distorted even when the telescope is properly aligned.
Atmospheric turbulence and a telescope that hasn’t cooled sufficiently can also disturb the pattern.
Step 5: Decide whether adjustment is necessary
If the rings look symmetrical and your telescope produces sharp views when conditions are good, there’s no reason to start turning adjustment screws.
If the pattern remains clearly off-center, collimation may improve the view.
The star test helps you decide whether there’s a problem. A collimation tool can make correcting it considerably easier.
How to adjust your Dobsonian’s mirrors
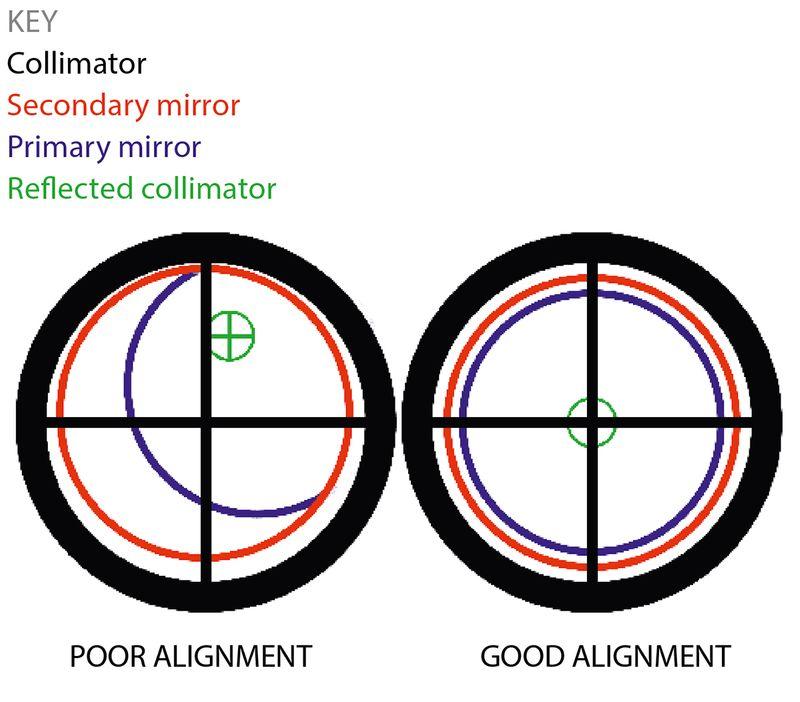
For most beginners, the safest approach is to check alignment with a suitable collimation tool in daylight before making a final check under the stars.
A collimation cap, Cheshire eyepiece, or properly aligned laser collimator can help.
The basic sequence is straightforward.
1. Check the secondary mirror first
With the telescope safely pointed away from the Sun, remove the eyepiece and insert a collimation cap or sight tube.
Look through the small viewing hole.
The secondary mirror should appear reasonably centered beneath the focuser, and the reflection of the primary mirror should be visible within it.
If the secondary is already correctly positioned, leave it alone.
If it is significantly misaligned, follow your telescope manufacturer’s instructions for adjusting its position and tilt. These adjustments are more involved than routine primary-mirror collimation.
Avoid loosening the central secondary-mirror bolt casually, as it helps support the mirror assembly.
2. Check the primary mirror
Most Dobsonians have adjustment screws or knobs at the rear of the telescope tube.
These let you adjust the primary mirror’s angle slightly.
Using a Cheshire or an appropriate collimation tool, make small adjustments until the relevant alignment markings are centered, following the tool’s instructions.
Some telescopes also have locking screws that must be loosened before adjustment and gently secured afterward.
Don’t force anything. Different Dobsonian models use different arrangements, so check your telescope’s manual before turning unfamiliar screws.
3. Check the result under the stars
Once you’ve adjusted the mirrors, repeat the star test.
Center a bright star, use suitable magnification, and examine the slightly defocused image.
If the pattern is symmetrical and the focused star looks sharp under steady conditions, you’ve achieved what matters.
You don’t need to chase perfection every time you take your telescope outside.
Apertura 1.25″ Laser Collimator with 45-deg Angled Face
How often does a Dobsonian need collimation?
This is where beginners can become unnecessarily worried.
Collimation is something to check, not something you automatically need to redo every week.
A solid-tube Dobsonian that stays assembled and is handled carefully may hold its alignment well between observing sessions.
The primary mirror can shift slightly during transport or with temperature changes, so a quick check before observing is sensible, particularly if you’re planning high-power planetary viewing.
The secondary mirror usually needs much less attention once it’s properly positioned.
A telescope that’s regularly transported over rough roads may require more frequent adjustment. A truss-tube Dobsonian that is dismantled and reassembled will generally need checking more often.
The practical rule is simple: check alignment when appropriate, adjust when necessary, and leave well-aligned mirrors alone.
Collimation should become a minor part of telescope ownership, not a reason to dread setting up.
Do you need to buy a laser collimator?
Not necessarily.
A simple collimation cap or Cheshire eyepiece can be effective, and a laser isn’t automatically more accurate.
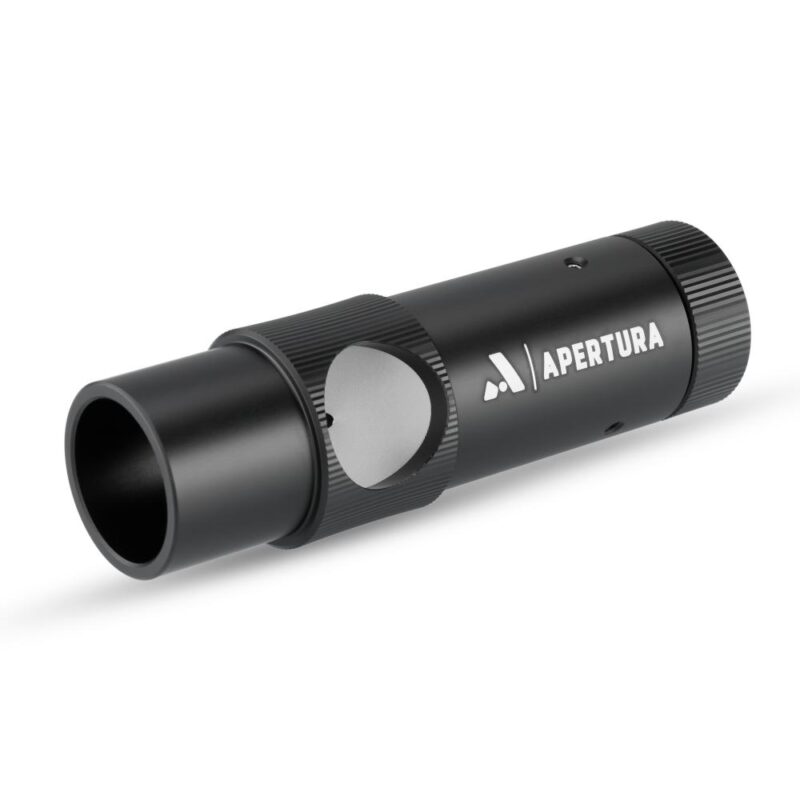
However, a properly aligned laser collimator can make routine checks convenient, particularly when the telescope’s adjustment knobs are at the opposite end of the tube from the focuser.
The laser projects a beam towards the primary mirror’s centre marking, making it easier to assess the secondary mirror’s tilt. The returning beam can also help with primary alignment, although small alignment errors can affect accuracy. A Cheshire eyepiece is useful for confirming the final primary mirror adjustment.
For Dobsonian owners who don’t already have a collimation tool, the Apertura 1.25-inch Laser Collimator is one option worth considering.
Before purchasing, check what came with your telescope. The Apertura AD8, for example, already includes a laser collimator in its standard accessory package.
There is no benefit in buying a second one if the tool you have works correctly.
Never look directly into a laser beam or its reflections, and never use a laser collimator while the telescope is pointed towards people, aircraft, or the Sun.
What if your telescope is still blurry after collimation?
If the mirrors are aligned but the image remains disappointing, the problem may lie elsewhere.
Try observing the Moon at moderate magnification. Its bright, high-contrast features make it a useful target for checking focus and image sharpness.
Allow additional cooling time if the telescope has recently been moved outdoors.
Try a different eyepiece, particularly one that gives lower magnification.
And remember that the atmosphere sets a limit on what you can see. Even a perfectly collimated Dobsonian cannot produce consistently sharp planetary views when the air is turbulent.
If you’ve worked through these checks, our First Telescope Mistakes guide explains other common reasons beginners struggle with their first observations.
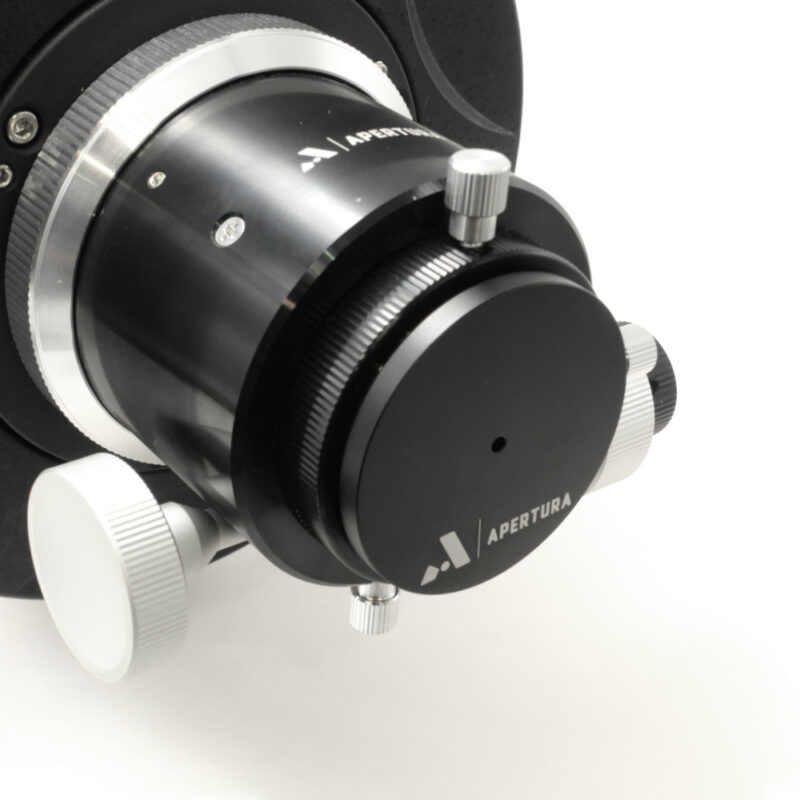
Apertura 2″ Collimation Cap
A well-aligned telescope should make observing easier, not harder.
Collimation sounds technical at first, but the idea behind it is simple.
Your Dobsonian has two mirrors. They need to direct light along the correct path to your eyepiece.
Once you understand what each mirror does, learn to recognize a reasonably symmetrical star-test pattern and make small adjustments only when necessary, and the process becomes far less intimidating.
Most importantly, don’t assume every blurry view means something is wrong with your telescope.
Sometimes the mirrors need attention. Sometimes the atmosphere simply isn’t cooperating.
Knowing the difference helps you spend less time worrying about equipment and more time enjoying the night sky.
A good Dobsonian doesn’t need constant tinkering. It needs sensible care, occasional checks, and plenty of clear nights.
Explore beginner telescopes,binoculars and best stargazing apps for beginners here: