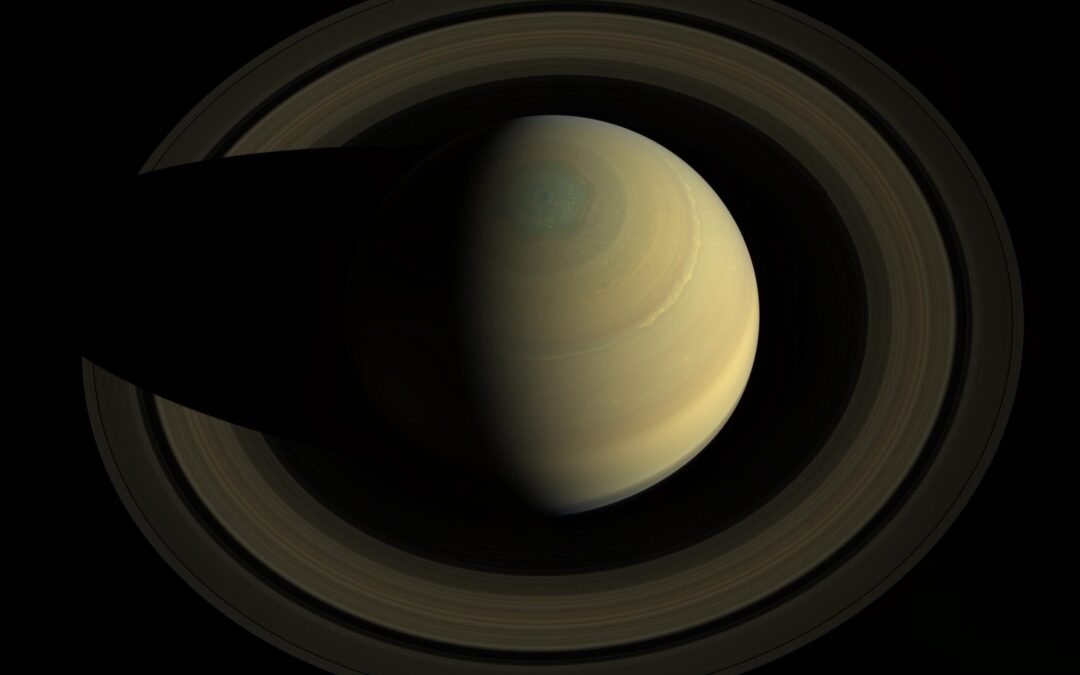
Aperture vs Magnification
That 600× magnification printed on a telescope box might be the least useful number on it.
Aperture determines what a telescope can show you. Magnification simply enlarges the image. You can change magnification later with another eyepiece, but you cannot increase the telescope’s aperture without replacing its main optics.
So when buying your first telescope, prioritize useful aperture, a stable mount, and equipment you can comfortably handle. Don’t pay extra simply because a box promises enormous magnification.
Here’s why that advice matters, what the numbers actually mean, and how to avoid buying a telescope that disappoints.
1. The Two Numbers That Expose the Magnification Myth
Imagine comparing two telescopes with the same 8-inch aperture.
One is a traditional Dobsonian reflector. The other is a computerized Schmidt-Cassegrain telescope.
In the retailer listings I found, the 8-inch Dobsonian has a highest useful magnification of 200×, while the 8-inch Schmidt-Cassegrain has 480×.
That’s more than twice the advertised magnification, even though both telescopes have approximately 203 mm of aperture.
How can that be?
Because manufacturers and retailers don’t always use the same criteria when describing maximum or recommended magnification. The figures may reflect different operating guidelines, optical designs, or supplied accessories.
The two telescopes have broadly comparable theoretical light-gathering and resolving potential because their apertures are the same, although optical design and transmission still affect actual performance.
The larger magnification figure doesn’t automatically mean the second telescope will reveal twice as much detail.
And that’s the problem with buying a telescope based on the largest number printed on its box.
A 600× claim may sound impressive, but if the telescope cannot produce a sharp, bright image at that power, the number has little practical value.
The question isn’t how much a telescope can magnify. It’s how much useful detail it can show you.
2. What Aperture Actually Buys You
Aperture is the diameter of a telescope’s main light-collecting lens or mirror.
In a refractor, it’s the front objective lens. In a reflector, it’s the primary mirror.
A 6-inch telescope has an aperture of approximately 152 mm. An 8-inch telescope has an aperture of approximately 203 mm.
That difference matters because aperture determines two fundamental capabilities: how much light the telescope can collect and how much fine detail it can theoretically resolve.
A larger aperture can reveal fainter stars, make some deep-sky objects easier to detect, and distinguish smaller features on the Moon and planets.
How much more light does a larger aperture collect?
Light-gathering area increases with the square of the aperture diameter.
Double the diameter, and you increase the collecting area fourfold.
Here’s how common beginner telescope sizes compare with a 60 mm instrument.
| Aperture | Relative light-collecting area |
| 60 mm | 1× |
| 70 mm | 1.36× |
| 114 mm | 3.61× |
| 130 mm | 4.69× |
| 150 mm | 6.25× |
| 203 mm | 11.45× |
These are geometric comparisons. Actual light transmission varies between optical designs.
Look at the difference between 60 mm and 203 mm.
The larger telescope has more than eleven times the light-collecting area.
That’s a substantial optical advantage.
No eyepiece can give the smaller telescope that extra light-collecting area.
3. The Moon Shows Why Aperture Matters
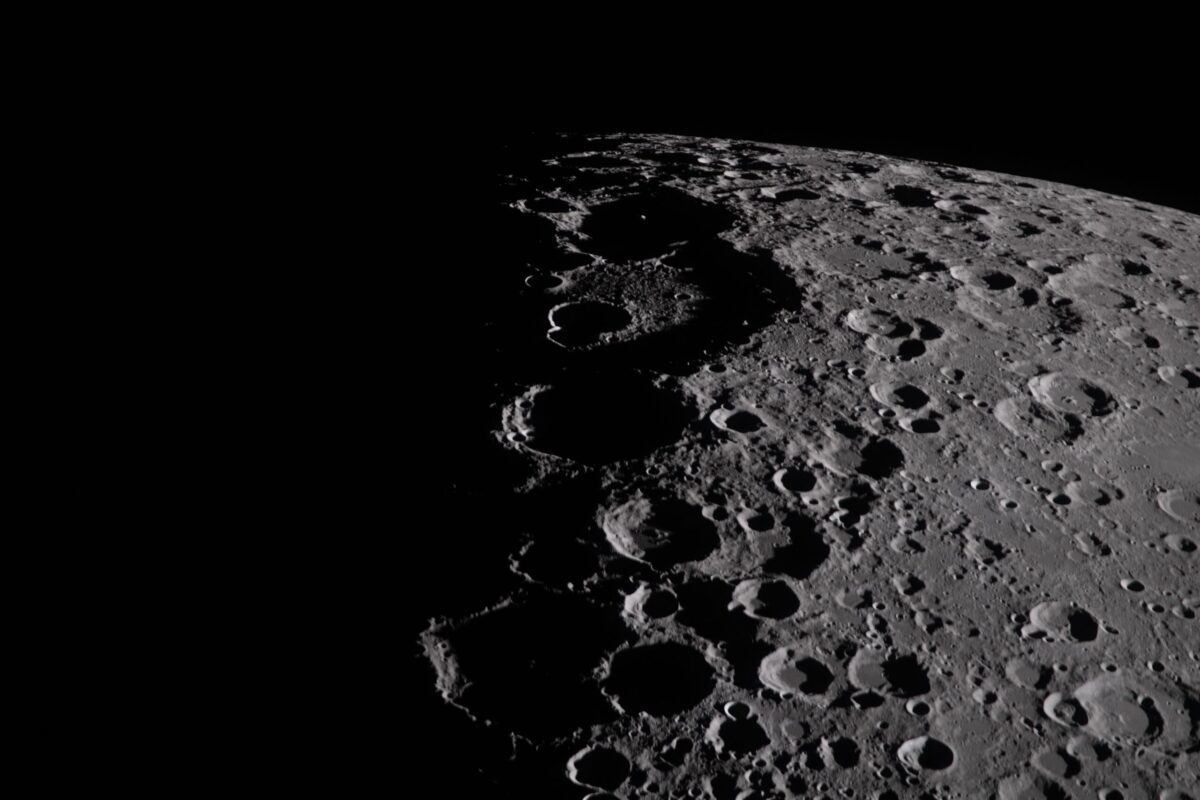
The Moon is one of the best places to appreciate the difference between aperture and magnification.
Even a modest telescope can reveal major craters, mountain ranges, dark lunar plains, and the striking shadows along the terminator, where lunar day meets night.
But increasing aperture allows you to distinguish progressively smaller details.
Astronomy writer Gary Seronik has discussed approximate lunar crater visibility at different apertures.
A 3-inch telescope can reveal craters around 4 kilometers across. A 6-inch telescope can distinguish features around 1.5 kilometers, while a 12.75-inch telescope can reveal features smaller than one kilometer under excellent conditions.
Think about what that means.
A smaller telescope can show you the Moon’s major landscape. A larger instrument can begin to reveal details within that landscape that were previously invisible.
Increasing magnification makes an existing crater appear larger.
Increasing aperture can reveal a smaller crater that the previous telescope couldn’t resolve.
That’s the difference between enlarging an image and discovering additional detail.
4. What Magnification Really Does
Magnification makes an object appear larger.
It’s useful when observing lunar craters, Jupiter’s cloud belts, Saturn’s rings, and other relatively small objects.
But magnification can’t create light or detail the telescope hasn’t collected or resolved.
As you increase magnification, the image becomes larger, but its surface brightness decreases. The field of view narrows, and atmospheric movement and vibration become more noticeable.
Eventually, the image gets bigger without becoming more informative.
Astronomers call this empty magnification.
You might see a large, fuzzy Jupiter instead of a smaller, sharper planet with recognizable cloud belts.
How to calculate telescope magnification
The calculation is straightforward:
Magnification = Telescope focal length ÷ Eyepiece focal length
Consider a telescope with a focal length of 1,200 mm.
| Eyepiece | Magnification |
| 25 mm | 48× |
| 10 mm | 120× |
| 9 mm | 133× |
| 6 mm | 200× |
| 4 mm | 300× |
The telescope hasn’t changed.
Only the eyepiece has.
That’s why you can alter magnification without buying a different telescope.
But it doesn’t mean every magnification will produce a useful image.
5. The Ceiling the Sky Sets
Even an excellent telescope has limits, and some come from the atmosphere above you.
Astronomers call atmospheric steadiness seeing.
On a night of poor seeing, stars may twinkle strongly while planetary images shimmer and blur.
Increasing magnification enlarges that distortion along with the planet.
The Dooley Planetarium at Francis Marion University has provided these approximate usable magnification ranges for average observing conditions.
| Aperture | Typical usable magnification |
| 3 inches | 120–150× |
| 6 inches | 150–200× |
| 8 inches | 200–250× |
A commonly quoted theoretical guideline is approximately 50× per inch of aperture, or around 2× per millimeter.
That gives a 70 mm telescope a theoretical upper range around 140× and a 150 mm telescope around 300×.
But the atmosphere often sets a lower practical limit.
On many nights, a sharp image at 120× will reveal more useful detail than a blurred image at 250×.
A smaller, steady image is usually more satisfying than a large, unsteady one.
6. Too Much Magnification Can Make You Miss the Best Objects
Here’s something many beginners don’t discover until after buying their telescope.
Higher magnification doesn’t just enlarge objects.
It also reduces how much sky you can see at once.
And that can be a serious disadvantage when observing large star clusters.
Understanding field of view
An eyepiece has an apparent field of view, which describes how wide the visible circle appears to your eye.
The true field of view describes how much of the actual sky fits within that circle.
You can estimate true field of view using:
True field of view ≈ Apparent field of view ÷ Magnification
For example, a 25 mm eyepiece with an apparent field of 52 degrees, used at 48× magnification, provides an estimated true field of:
52 ÷ 48 = 1.08 degrees
That’s useful for many celestial objects.
But not all of them.
The Pleiades problem
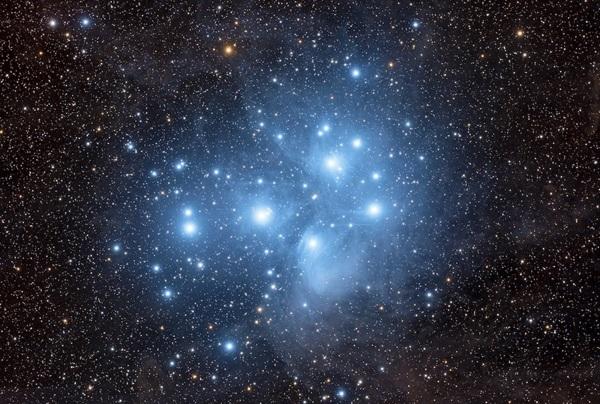
The Pleiades, also called the Seven Sisters, are among the most beautiful star clusters visible to the naked eye.
The prominent cluster spans approximately 110 arcminutes, or 1.83 degrees.
Now compare that with the telescope’s 1.08-degree field of view.
The entire cluster won’t fit.
You’ll see individual stars, but lose some of the wider pattern that makes the Pleiades so attractive.
This is why binoculars can sometimes provide a more satisfying view than a telescope.
A typical pair of binoculars offers a much wider field, so the cluster fits comfortably in view.
The Double Cluster
The Double Cluster in Perseus spans roughly a degree, depending on where you consider its boundaries.
At 48×, with a field of approximately 1.08 degrees, it may fit only narrowly.
Increase magnification, and you begin to lose the wider setting.
The lesson?
Sometimes the best magnification is less magnification.
A telescope’s ability to show wide areas of sky deserves attention alongside its ability to enlarge small objects.
7. How Large Will Jupiter and Saturn Actually Look?
This is where realistic expectations matter.
The photographs printed on telescope packaging often show planets with impressive colors and detail.
Those images may have been captured using cameras, processed digitally, or taken with equipment far more sophisticated than the telescope being advertised.
Visual observing is different.
The planets usually appear much smaller than beginners expect.
Jupiter
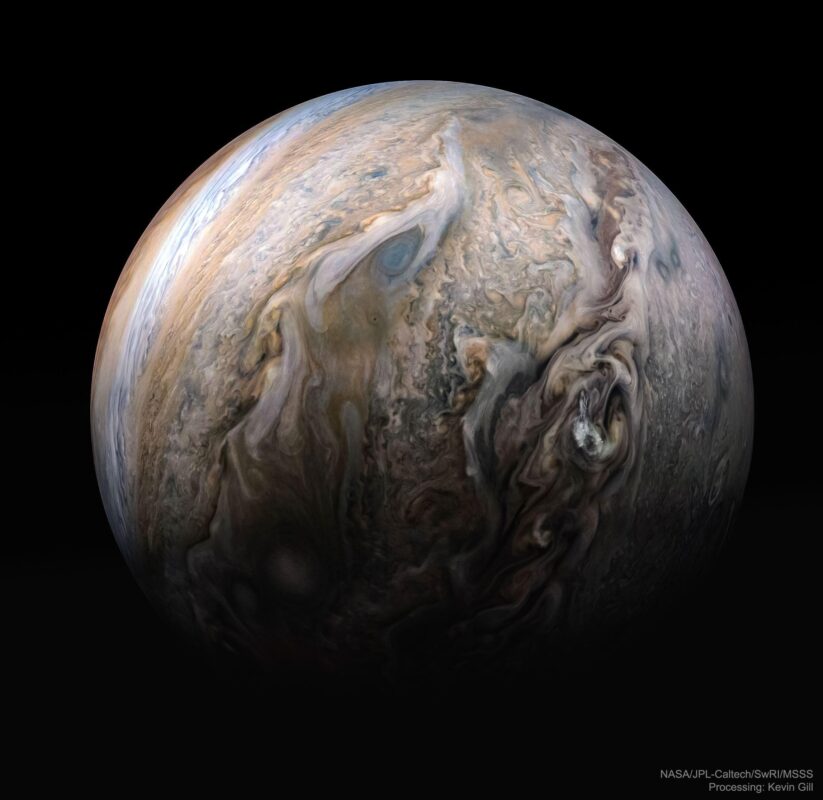
At favorable oppositions, Jupiter’s apparent diameter is roughly 45–50 arcseconds, depending on its distance from Earth.
For comparison, the full Moon is approximately 1,800 arcseconds across.
At around 40× magnification, Jupiter can appear about the same apparent diameter as the full Moon seen with the unaided eye.
At 48×, it appears slightly larger.
That’s still a relatively small disc within a much larger dark field.
But it’s a remarkable sight.
With a modest telescope, you can often see Jupiter’s four large Galilean moons as tiny points of light.
Their positions change from night to night as they orbit the planet.
Under suitable conditions, Jupiter’s two prominent cloud belts may also become visible.
With greater aperture, steady air, and careful observing, finer atmospheric details can emerge.
Saturn
At its October 2026 opposition, Saturn’s globe was approximately 20 arcseconds across, while its ring system extended across a considerably larger apparent width.
At around 48×, the rings can appear roughly as wide as the full Moon seen without a telescope.
Increase magnification and the planet appears larger, provided the atmosphere supports the additional power.
But even through a capable beginner telescope, Saturn won’t fill your eyepiece like a spacecraft photograph.
It often looks like a small, delicate jewel suspended against a dark background.
Imagine finding Saturn for the first time.
You adjust the focus, the image settles, and suddenly those unmistakable rings appear around a planet hundreds of millions of kilometers away.
It’s a small image, but an extraordinary discovery.
And that’s part of what makes visual astronomy so rewarding.
8. What Different Apertures Reveal on Real Targets
Let’s compare what beginners can expect from several telescope sizes.
A 60 mm telescope
A well-made 60 mm telescope can show major lunar features, Jupiter’s four large moons, and Saturn’s rings when their orientation is favorable.
You may also see Jupiter’s main cloud belts.
Small instruments can detect some moon-shadow transits across Jupiter, although they are challenging.
The limitations become more noticeable when attempting faint deep-sky objects or subtle planetary details.
A 114 mm reflector
A good 114 mm reflector provides a noticeable increase in light gathering compared with a 60 mm telescope.
It can reveal smaller lunar features and provide rewarding views of bright clusters and nebulae.
The Orion Nebula, the Double Cluster and the brighter central region of the Andromeda Galaxy become worthwhile targets.
Jupiter and Saturn can also reveal more detail when conditions allow.
A 150 mm telescope
At approximately 6 inches, the additional aperture offers greater potential for planetary detail and faint-object observing.
Jupiter’s moon-shadow transits can become easier to recognize.
Under steady conditions, Saturn may reveal subtle atmospheric features and, when the ring geometry permits, the Cassini Division between its major rings.
The Moon offers a rich landscape of smaller craters and fine shadows.
A 203 mm telescope
An 8-inch telescope collects substantially more light than the smaller examples.
That additional capability can be especially rewarding when observing star clusters, nebulae and galaxies from dark locations.
The Trapezium star grouping within the Orion Nebula is a good example of a target where greater aperture and resolving power can help reveal additional components.
Jupiter can also reveal more subtle atmospheric detail.
Of course, atmospheric conditions, light pollution, and observing experience influence what any telescope reveals.
But the underlying pattern is clear: additional aperture increases your observing potential.
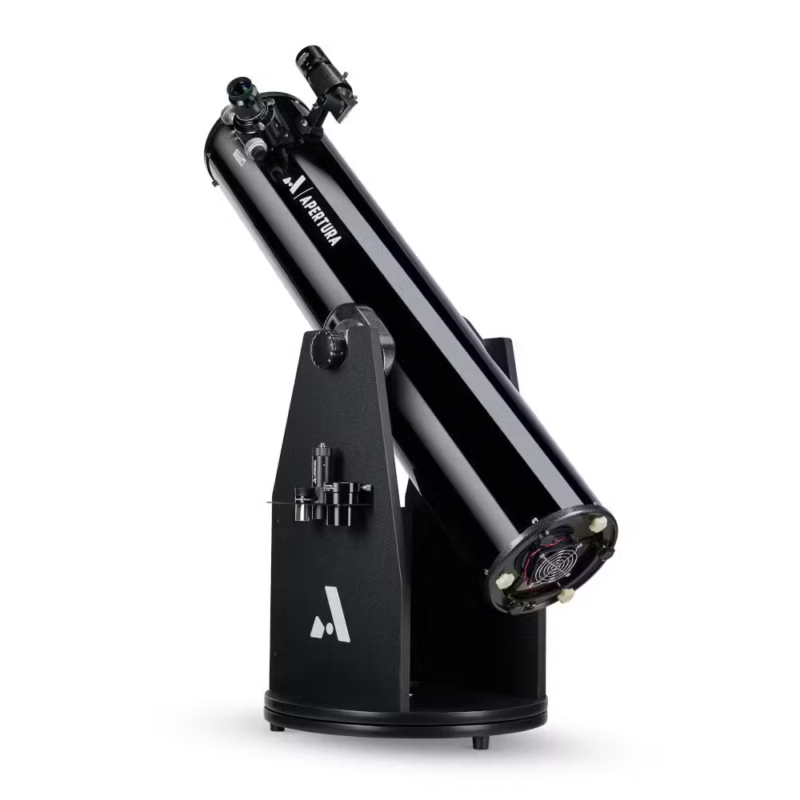
The Apertura AD8 8-inch Dobsonian telescope. Its larger aperture provides greater light-gathering potential, but size and handling matter too.
9. Aperture Side by Side: What Are You Actually Buying?
The following comparison brings together the optical differences and practical considerations.
| Aperture | Light gathering vs 60 mm | Typical strengths | Main consideration |
| 60 mm | 1× | Moon, bright planets, introductory observing | Limited faint-object capability |
| 114 mm | 3.61× | Moon, planets, brighter clusters and nebulae | Mount and optical design matter |
| 150 mm | 6.25× | Broader visual observing, finer planetary and lunar detail | Larger equipment to handle |
| 203 mm | 11.45× | Stronger deep-sky capability and greater resolving potential | More storage and handling required |
A larger telescope offers greater optical potential, but it also introduces practical considerations.
For example, compare two established Dobsonian telescopes: the Apertura AD6 and AD8.
Our October 2026 reference prices were:
The AD8 therefore represents an additional US$200 at those reference prices.
The larger telescope also requires more storage space and greater effort to move.
That additional money buys more light-gathering ability, but the decision isn’t simply about optical performance.
It’s about whether the extra capability justifies the additional cost and handling requirements for your circumstances.
If you’re comparing these two sizes specifically, our 6-Inch vs 8-Inch Dobsonian Telescope guide explores that decision in greater detail.
10. Where Your Money Goes Furthest
When you’re comparing beginner telescopes, four considerations matter more than advertised maximum magnification.
First: Useful aperture and optical quality
Choose a telescope that can show the objects that interest you.
If you’re primarily interested in the Moon and bright planets, a modest aperture can provide rewarding views.
If faint galaxies and nebulae appeal to you, additional aperture becomes more valuable.
Second: A stable mounting system
Imagine observing Jupiter at 120×.
You touch the focuser.
The image starts shaking.
You wait for the movement to settle, adjust the focus again, and accidentally move the planet out of view.
Even a telescope with good optics can become frustrating if its mount is unstable.
A well-designed Dobsonian base can provide excellent stability without complicated electronics. A refractor on a suitable tripod can also perform very well.
But a poorly supported mount may undermine the entire experience.
Useful aperture on a stable mount is worth far more than impressive magnification on an unstable one.
This is one of the warning signs explored in our First Telescope Hobby Killer guide.
Third: Practical handling and storage
If larger apertures can collect more light and resolve finer detail, why wouldn’t everyone buy the biggest telescope possible?
Because observing is something you do, not simply a specification you own.
A larger telescope may be less convenient if you have limited storage space, need to carry equipment upstairs, want to take it on holidays, or prefer short observing sessions.
A smaller telescope that’s easy to take outside can provide far more enjoyment than a larger one you rarely use.
The practical question isn’t simply, How much aperture can I afford?
It’s also, How much telescope am I willing and able to use regularly?
Fourth: Eyepieces and accessories
Eyepieces affect your magnification and field of view.
But you can purchase additional eyepieces later.
You cannot turn a 70 mm telescope into a 150 mm telescope by changing an eyepiece.
That’s why it makes sense to prioritize the telescope’s underlying optical capability before spending money on extra accessories.
The whole system needs to work together.
11. Five Questions to Ask Before Buying
Before deciding between two telescopes, ask yourself these questions.
1. What do I want to observe?
The Moon and bright planets are rewarding through relatively modest telescopes. Faint galaxies and nebulae generally benefit from greater aperture and darker skies.
2. What is the actual aperture?
Look for the diameter of the main lens or mirror. Don’t substitute advertised magnification for this specification.
3. Is the mount stable?
Investigate the mounting system, focusing behavior, and ease of use. A shaky telescope can be frustrating regardless of aperture.
4. Can I comfortably move and store it?
Consider the complete telescope, including its tube, base, or tripod.
5. Am I paying for optical performance or an advertising claim?
Compare optical design, aperture, mount quality, included eyepieces, and realistic observing capabilities.
These questions turn a confusing collection of numbers into a practical buying decision.
12. What If You’ve Already Bought a Telescope?
Perhaps you’ve already purchased a telescope, and the first view was disappointing.
Before deciding you’ve bought the wrong instrument, consider whether the problem is magnification, atmospheric conditions, or setup.
Many beginners start with the highest magnification available because they assume it must give the best view.
Often, the opposite is true.
Try starting with your longest-focal-length eyepiece.
Locate and center a bright object, focus carefully, and give yourself time to observe.
Then increase magnification gradually.
If the image becomes dim, soft or unsteady, return to a lower power.
A different eyepiece may improve the experience considerably without requiring a new telescope.
Our First Telescope Mistakes guide explains the common reasons beginner telescope views disappoint and how to improve them.
Frequently Asked Questions
Is aperture more important than magnification?
Generally, yes, when choosing a telescope. Aperture determines light-gathering potential and influences resolving power. Magnification enlarges the image but cannot create detail beyond the limits of the optics and observing conditions.
Is 600× magnification good for a beginner telescope?
Not necessarily. Such a high figure is often impractical for small beginner telescopes. Useful magnification depends on aperture, optical quality, atmospheric steadiness and the object being observed.
Is a 70 mm telescope good enough for beginners?
Yes. A well-made 70 mm telescope on a stable mount can provide satisfying views of the Moon, bright planets and numerous other celestial objects. Its limitations become more noticeable with faint deep-sky targets and fine planetary detail.
Does a larger aperture always mean a better telescope?
No. Greater aperture provides more optical potential, but mount stability, optical quality, portability, cost, and observing circumstances all matter.
Why does higher magnification make objects look dimmer?
As magnification increases, the light from an extended object is spread across a larger apparent area. Its surface brightness decreases, making the image appear dimmer.
Why are binoculars sometimes better than a telescope?
Binoculars generally offer wider fields of view and are convenient to use. They can be especially rewarding for large star clusters such as the Pleiades, which may not fit within a telescope’s narrower field.
Final Thoughts: Buy the Capability, Not the Biggest Number
When you’re choosing your first telescope, it’s tempting to think the largest advertised number must mean the best performance.
But the sky doesn’t work that way.
Magnification is something you adjust. Aperture is something you buy.
A larger aperture can collect more light and resolve finer detail, but only with suitable optics, a stable mount, and observing conditions that let the telescope perform.
And even then, the largest telescope isn’t necessarily the best one for your circumstances.
The real goal isn’t to own the instrument with the most impressive specifications.
It’s to step outside on a clear evening, find something wonderful in the sky and enjoy the experience enough to do it again.
Choose a useful aperture, a stable mount and a telescope that suits your life. Let magnification come afterward.
If you’re ready to compare telescope designs, budgets and practical choices, continue with our Buying Your First Telescope: Complete Beginner’s Guide.
And if you’re not ready to buy anything yet, our free guide, What You Can See in the Night Sky Without a Telescope, is a useful place to begin. It helps you discover what is already visible above you before spending money on equipment.
Explore beginner telescopes,binoculars and best stargazing apps for beginners here:
Affiliate disclosure: White Star Outdoors may earn a commission from qualifying purchases made through affiliate links, at no additional cost to you. Our recommendations are meant to help beginners make informed decisions, not encourage unnecessary purchases.