Align a Telescope Finder Scope
A correctly aligned telescope finder helps beginners locate objects before looking through the main telescope eyepiece. You’ve set up your new telescope, found something interesting in the night sky, and pointed towards it. But when you look through the eyepiece, there’s nothing there.
You move the telescope a little—still nothing.
This is one of the most frustrating experiences for a beginner, and it can turn an exciting first night into an evening of searching without finding anything.
Fortunately, the problem may be surprisingly simple.
Your finder scope and your main telescope might be pointing in slightly different directions.
Aligning them takes only a few minutes once you know what to do. Better still, you can complete most of the process during daylight, long before the stars appear.
What is a telescope finder scope?
A finder scope is a small aiming device attached to the main telescope tube.
Its purpose is to help you point your telescope towards an object before looking through the main eyepiece.
Because a telescope shows only a small section of the sky, finding an object directly through the eyepiece can be difficult.
The finder gives you a wider view or a simple aiming reference, making it easier to locate the Moon, planets, and brighter stars.
There are two common types.
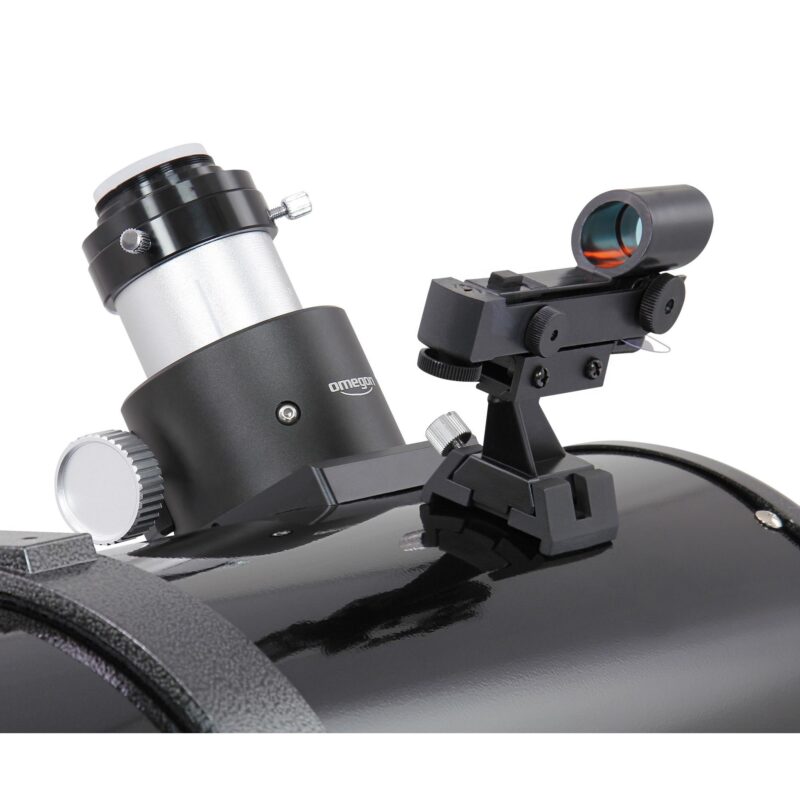
Optical finder scope: A small telescope with a wider field of view, often displaying crosshairs to help you center an object.
Red-dot finder: A device that projects a small illuminated dot onto a viewing window. You look through the window and place the dot over the object you want to observe.
Both serve the same purpose.
The finder and the main telescope must point towards the same target.
If they don’t, an object that appears perfectly centered in your finder may be completely outside the main telescope’s field of view.
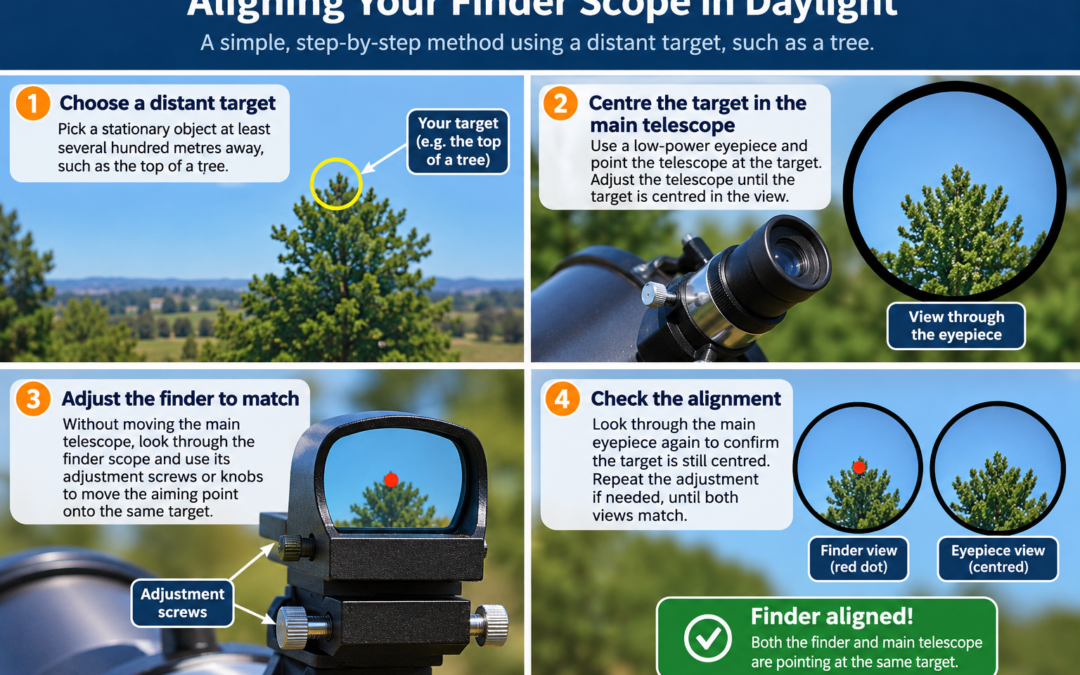
Step 1: Align your finder scope during daylight
This is the easiest and most important part of the process.
Don’t wait until your first observing session to discover that your finder is pointing in the wrong direction.
Choose a clear day and set up your telescope somewhere stable.
Choose a distant object.
Find a stationary object at least several hundred meters away.
The top of a distant tree, a rooftop aerial, or another clearly identifiable landmark works well.
Choose something with a distinct feature you can recognize through both the main telescope and the finder.
Avoid nearby objects, because their apparent positions can differ between the finder and the main telescope.
Never point your telescope or finder towards the Sun. Even a brief accidental view through an unfiltered telescope can cause permanent eye damage.
Center the object in your main telescope
Insert your lowest-power eyepiece into the telescope.
A low-power eyepiece provides a wider field of view, making it easier to locate your chosen landmark.
Point the main telescope towards the object and adjust its position until the landmark is centered in the eyepiece.
For example, if you’ve chosen the top of a distant tree, place that exact point in the center of the view.
Once it’s centered, keep the telescope stationary.
This is now your reference point.
Adjust the finder to match.
Without moving the main telescope, look through your finder scope.
You may notice that the object you centered in the main eyepiece appears somewhere else in the finder.
It may even be outside the finder’s field of view.
Use the finder’s adjustment screws or knobs to move its aiming point towards the same landmark.
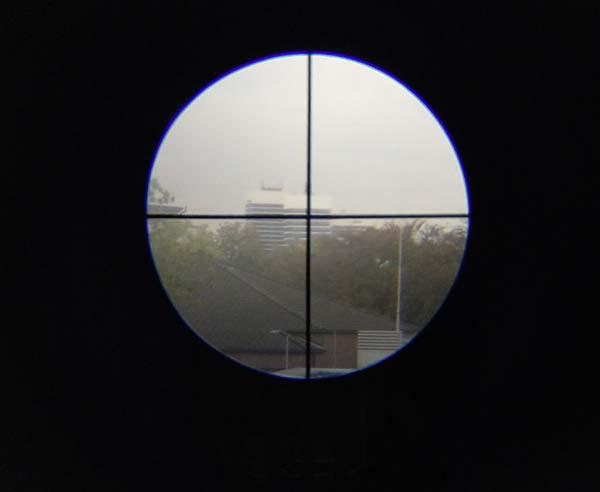
For an optical finder, position the crosshairs over the landmark.
For a red-dot finder, adjust the dot until it appears directly over the target.
Don’t move the main telescope during this step. Adjust the finder instead.
Continue until both the finder and the main telescope are aimed at the same feature.
Check the alignment
Look through the main telescope’s eyepiece again.
Is the landmark still centered?
If it has moved, center it again and repeat the finder adjustment.
Once the same object is centered in both views, your finder is aligned.
That’s the daylight work completed.
Step 2: Check your alignment after dark using the Moon
Daylight alignment should get you close, but a quick check under the night sky is worthwhile.
The Moon is an excellent target when it’s visible because it’s bright, easy to recognize, and relatively simple to locate.
Start with your lowest-power eyepiece.
Use the finder to point your telescope towards the Moon.
Then look through the main eyepiece.
Ideally, the Moon should appear in the field of view.
If it’s not centered, adjust the main telescope until the Moon appears in the middle of the eyepiece.
Now keep the main telescope still and check the finder.
Adjust its crosshairs or red dot so they point towards the same location on the Moon.
For greater precision, use a recognizable lunar feature or a smaller distant target, such as a bright star, to fine-tune the alignment.
Once the finder and telescope agree, you’re ready to begin observing.
If the Moon isn’t visible, use a bright star instead.
The Beginner Mistake that Causes So Much Frustration
There’s one mistake worth understanding before your first night.
Beginners sometimes try to find an object through the main eyepiece when they should be using the finder.
Imagine trying to locate a particular house by looking through a narrow tube.
You can see plenty of detail, but only a tiny section of the neighborhood.
That’s effectively what happens when you try to search the sky through a telescope eyepiece.
The finder solves this problem by giving you an easier way to aim.
The correct sequence is simple:
- Look through the finder and aim towards your target.
- Center the target using the finder’s crosshairs or red dot.
- Look through the main telescope’s low-power eyepiece.
- Center the object more precisely before increasing magnification.
With a properly aligned finder, this process becomes much easier.
You spend less time searching and more time observing.
What if the object still doesn’t appear in your eyepiece?
If you’ve aligned the finder but still struggle to locate objects, check a few simple things.
Make sure you’re using low magnification.
High-power eyepieces show a smaller area of the sky.
Start with your longest focal-length eyepiece, such as a 25 mm or 30 mm, depending on what came with your telescope.
Once you’ve found and centered the object, switch to higher magnification if conditions allow.
Check that the finder hasn’t moved.
A finder can shift slightly if its mounting bracket is loose or the telescope has been transported.
Check that it’s securely attached and repeat the alignment procedure if necessary.
Remember that optical finders may reverse the image.
Some optical finder scopes display an inverted or mirror-reversed image.
This is normal and depends on the finder design.
It can make aiming feel unfamiliar at first, particularly when you’re trying to move the telescope in a particular direction.
Take your time and make small movements.
Check the finder alignment again.
If the target consistently misses the eyepiece, return to a distant daytime landmark or a bright object at night.
Center the object in the main telescope first, then adjust the finder to match.
This simple check often resolves the problem.
How often should you align your finder scope?
Fortunately, you shouldn’t need to do this every time you observe.
Once properly aligned, a securely mounted finder may remain accurate for many observing sessions.
However, it’s worth checking after transporting your telescope, removing the finder, or accidentally knocking its mounting bracket.
A quick check before an observing session can save considerable frustration later.
You don’t need perfect alignment for every object, but the finder should be accurate enough to place your target within the field of view of your lowest-power eyepiece.
Make your first night easier.
Learning to align a finder scope is one of the simplest ways to make telescope ownership more enjoyable.
It requires no expensive equipment, and most of the work can be completed during daylight.
Once your finder and main telescope point towards the same target, locating the Moon, planets, and brighter stars becomes much more straightforward.
If you’re preparing for your first observing session, our guide to using your new telescope explains how to get started without becoming overwhelmed.
And if you’re still deciding which telescope is right for you, read our Buying Your First Telescope guide for practical advice on choosing a beginner-friendly instrument.
A properly aligned finder won’t make your telescope more powerful. It will make it much easier to use.
And on your first night beneath the stars, that can make all the difference.

Explore beginner telescopes, binoculars, and the best stargazing apps for beginners here: